
How to Build a Chargeback Management System That Works
Last Updated on April 28, 2026 by Dimitri Akhrin
A step-by-step tutorial for catching disputes early, displaying transparent pricing, and adding trust signals that protect your cash flow
Learn to configure dispute alerts, create pricing transparency, and integrate checkout trust signals. This 4-6 hour implementation gives you a documented workflow that catches chargebacks before they escalate.
TL;DR
- Audit your exposure first – Export 90 days of dispute data and calculate your chargeback ratio before building defenses
- Transparent pricing prevents disputes – Show all costs (shipping, taxes, fees) before customers enter payment details to eliminate “unauthorized amount” chargebacks
- Trust signals redirect complaints – Security badges and visible contact info encourage customers to reach you directly instead of filing with their bank
- Speed wins disputes – Set up real-time alerts and respond within 48 hours with complete evidence to maximize your win rate (merchants win 45% of re-presented chargebacks)
- Next-day funding protects cash flow – Get deposits the next business day so disputed transactions do not create operational gaps during 30 to 90 day resolution periods
What You Will Achieve
By the end of this tutorial, you will have a working chargeback management system that protects your cash flow and builds customer trust. You will configure transparent pricing displays, set up proactive dispute alerts, and integrate trust signals in checkout that reduce friction.
Your success criteria: a documented chargeback response workflow, pricing transparency across your checkout, and monitoring dashboards that flag disputes before they escalate. Expect to complete this implementation in 4 to 6 hours spread across two days.
Prerequisites and Setup Checklist
Before you start, confirm you have these items ready:
- Admin access to your eCommerce platform (Shopify, WooCommerce, BigCommerce, or similar)
- Merchant account credentials with your payment processor
- Transaction data from the past 90 days (export as CSV)
- Customer service email templates for dispute communication
- Brand assets (logos, security badges) for checkout trust signals
Time estimate: 4 to 6 hours total. Potential blockers include limited API access on basic eCommerce plans and delayed processor responses for alert setup. Budget an extra day if you need to upgrade your platform tier.
Why This Approach Works
Most merchants react to chargebacks after the damage is done. This tutorial flips that script. You will build a proactive system that catches disputes early, communicates pricing clearly, and gives customers reasons to contact you before filing with their bank.
Customer disputes often stem from unclear or unrecognized transactions, making proactive prevention strategies more effective than reactive dispute handling as outlined by Visa.
Your defense starts with transparency and speed. When customers see exactly what they pay and trust your checkout, they resolve issues directly with you.

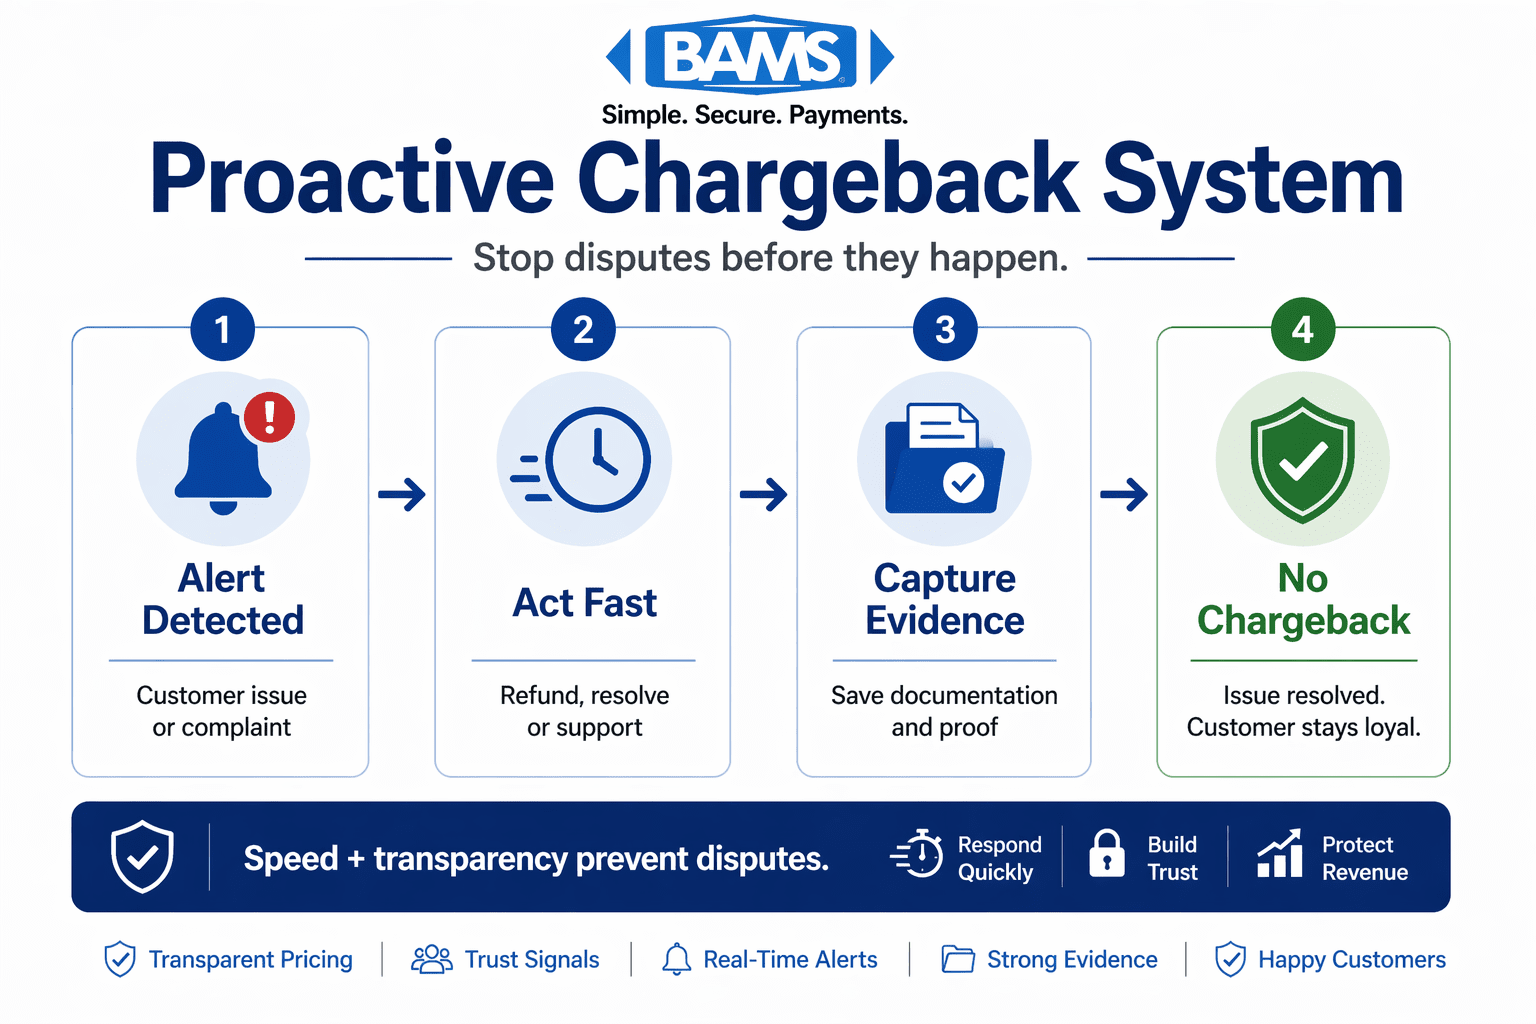
A proactive chargeback system that detects issues early, resolves customer concerns quickly, and prevents disputes before they escalate.
Step 1: Audit Your Current Chargeback Exposure
Action: Export your transaction and dispute data from the past 90 days. Open your merchant portal and navigate to Reports, then Disputes or Chargebacks.
Download the CSV file and open it in a spreadsheet. Create columns for: transaction date, dispute date, reason code, amount, and resolution status. Calculate your current chargeback ratio by dividing total disputes by total transactions.
Expected result: A clear picture of your dispute rate. Industry average sits at 0.56 to 0.60%. If you exceed 1%, card networks may flag your account. Card payments involve multiple cost layers including interchange, network assessments, and processor fees, which together define the financial impact of disputes on merchants as outlined by the Federal Reserve.
Common failure: Missing dispute data in exports. Fix: Contact your processor directly and request a complete dispute history report.
Step 2: Map Your Chargeback Reason Codes
Action: Review each dispute in your export and categorize by reason code. The major categories are: fraud (unauthorized transaction), product issues (not as described), and processing errors (duplicate charges).
Create a simple tally in your spreadsheet. Add a column called “Category” and mark each row as Fraud, Product, or Processing.
Expected result: You will see which category dominates your disputes.
Common failure: Unfamiliar reason codes. Fix: Reference your card network’s reason code documentation (Visa and Mastercard publish complete lists).
A breakdown of the most common chargeback causes and the actions businesses can take to prevent them before they escalate.
Step 3: Implement Transparent Pricing at Every Touchpoint
Action: Open your checkout page in edit mode. Add visible line items for: subtotal, shipping cost, taxes, and any fees. Remove hidden charges that appear only at final confirmation.
In your cart template, locate the order summary section. Add clear labels using your platform’s theme editor. Example for Shopify: navigate to Online Store, then Themes, then Edit Code, and find cart-template.liquid.
Common failure: Shipping costs still hidden until final step. Fix: Use shipping calculators that estimate costs on the cart page, not just at checkout.
Step 4: Add Trust Signals in Checkout
Action: Place security badges, payment logos, and contact information on your checkout page. Position them near the payment form where customers enter card details.
Upload your SSL certificate badge, accepted payment method icons, and a “Questions? Call us” link with your phone number. For trust signals in checkout, visibility matters more than quantity.
In your checkout template, add this structure:
<div class=”trust-signals”>
<img src=”ssl-badge.png” alt=”Secure Checkout”>
<img src=”visa-mc-amex.png” alt=”We Accept Visa, Mastercard, Amex”>
<p>Questions? <a href=”tel:+1234567890″>Call (123) 456-7890</a></p>
</div>
Common failure: Badges load slowly or break on mobile. Fix: Compress images and test on multiple devices before publishing.
Step 5: Configure Chargeback Alerts with Your Processor
Action: Log into your merchant services portal. Navigate to Settings, then Notifications or Alerts. Enable real-time chargeback notifications via email and SMS.
Set alert thresholds: immediate notification for any dispute, daily summary of transaction flags, and weekly ratio reports. If your processor offers dispute prevention alerts (like those from Verifi or Ethoca), enable them.
Modern payment infrastructure improves transaction visibility and response speed, enabling businesses to act on disputes earlier and manage risk more effectively according to Modern Treasury.
Expected result: You receive alerts within hours of a dispute filing, not days. Early notification gives you time to issue refunds before chargebacks finalize.
Common failure: Alerts go to an unmonitored inbox. Fix: Route notifications to a shared team inbox or Slack channel that gets checked daily.
For merchants needing stronger prevention tools, implementing chargeback defense solutions with real-time alerts and automation significantly reduces dispute risk.
Step 6: Build Your Dispute Response Workflow
Action: Create a documented process for handling each dispute within 24 hours of notification. Your workflow needs three stages: acknowledge, gather evidence, and respond.
Build a response template folder with these documents ready:
- Proof of delivery (tracking numbers, delivery confirmation)
- Transaction records (authorization logs, AVS/CVV match data)
- Customer communication history (emails, chat transcripts)
- Product descriptions and terms of service
Expected result: A repeatable process that any team member can execute.
Common failure: Missing evidence due to poor record-keeping. Fix: Start logging all customer interactions and shipping confirmations in a central system today.
Step 7: Expand Payment Method Variety
Action: Review your current payment options and add alternatives that reduce fraud risk. Digital wallets (Apple Pay, Google Pay) include built-in authentication that lowers dispute rates.
In your payment gateway settings, enable additional methods. For payment method variety, prioritize options with strong buyer verification: digital wallets, PayPal, and buy-now-pay-later services with their own dispute processes.
Expected result: Customers choose payment methods they trust. Authenticated payments (like those requiring biometric confirmation) carry lower fraud liability for you.
Common failure: New payment methods not appearing at checkout. Fix: Clear your site cache and verify the payment gateway connection in your platform settings.
Offering multiple payment options also helps prevent shopping cart abandonment by meeting customer preferences.
Step 8: Set Up Automated Response Tools
Action: Connect your chargeback management system to automation tools that pre-fill response templates and submit evidence automatically.
If your processor offers an API, integrate it with your order management system. This pulls transaction data, shipping info, and customer details into dispute responses without manual copying.
Expected result: Faster response times and fewer errors.
Common failure: API integration errors due to mismatched data formats. Fix: Test with a single transaction before enabling automation for all disputes.
Step 9: Integrate Next-Day Funding to Protect Cash Flow
Action: Contact your merchant services provider about next-day funding options. This ensures disputed funds do not create cash flow gaps while you fight chargebacks.
Integrating guaranteed next day funding ensures you maintain consistent cash flow even while disputes are being resolved. When chargebacks hit, you have already accessed your revenue, giving you working capital to manage disputes without financial strain.
Expected result: Predictable cash flow even during dispute periods. You can cover operational costs while waiting for chargeback resolutions that take 30 to 90 days.
Common failure: Missing cutoff times for next-day deposits. Fix: Confirm your processor’s daily cutoff (often 10 PM or 11 PM local time) and batch transactions accordingly.
Step 10: Create Your Monitoring Dashboard
Action: Build a simple tracking spreadsheet or use your processor’s analytics to monitor key metrics weekly. Track: chargeback ratio, dispute win rate, average resolution time, and cost per dispute.
Set up a weekly review meeting (15 minutes) to check these numbers. Flag any ratio approaching 0.9% for immediate action.
Expected result: Early warning when dispute rates climb. You catch problems before card networks impose penalties or higher processing fees.
Common failure: Dashboard data lags behind real-time disputes. Fix: Ensure your data sources update daily, not weekly.
Configuration and Customization Options
Your system needs adjustment based on your business model. Here are the key variables to customize:
- Alert threshold: Start with notifications for every dispute. Once volume stabilizes, adjust to daily summaries for low-risk transactions.
- Response deadline: Card networks give you 7 to 30 days to respond. Set internal deadlines at 48 hours to ensure you never miss a window.
- Evidence requirements: High-ticket items need more documentation. Create tiered evidence checklists based on transaction value.
- Refund threshold: Decide the dollar amount below which you refund automatically rather than fight. For many merchants, disputes under $25 cost more to fight than to accept.
Safe defaults: Enable all alerts, respond within 48 hours, and fight disputes over $50. Must-change settings: Your contact information on checkout pages and your response template folder location.
Verification and Testing
Before going live, verify each component works correctly:
- Test checkout transparency: Complete a test purchase and confirm all costs display before payment submission.
- Test alert delivery: Ask your processor to send a test notification. Confirm it reaches your team within 1 hour.
- Test response workflow: Run a mock dispute through your process. Time how long evidence gathering takes.
- Test trust signals: Load your checkout on mobile and desktop. Verify badges display correctly and contact links work.
Success definition: All tests pass, and your team can respond to a mock dispute with complete evidence within 4 hours.
Common Errors and Fixes
Error: “Chargeback notification not received”
Cause: Email filters blocking processor messages or incorrect contact info in merchant portal. Fix: Whitelist your processor’s domain and verify the email address in your account settings.
Error: “Evidence submission rejected”
Cause: File format not accepted (wrong image type, oversized PDFs) or missing required fields. Fix: Convert files to accepted formats (usually PDF under 10MB) and use your processor’s evidence checklist.
Error: “Trust badges not displaying”
Cause: Broken image paths or JavaScript conflicts with other checkout scripts. Fix: Use absolute URLs for badge images and test in your browser’s developer console for errors.
Error: “Chargeback ratio spiking despite prevention”
Cause: Friendly fraud from repeat offenders or a specific product category. Fix: Analyze disputes by SKU and customer to identify patterns. Consider requiring signature confirmation for high-risk items.
Error: “Payment method not appearing at checkout”
Cause: Gateway not properly connected or method not enabled for your region. Fix: Re-authenticate your payment gateway connection and check regional availability in your processor’s documentation.
Next Steps and Extensions
With your chargeback management system running, consider these extensions:
- Fraud scoring integration: Add pre-transaction fraud detection that flags suspicious orders before they ship.
- Customer communication automation: Send proactive emails when orders ship and deliver, reducing “where is my order” disputes.
- Chargeback insurance: For high-volume merchants, explore insurance products that cover losses from disputes you cannot win.
Understanding how merchant services support positive cash flow helps you evaluate whether your current provider offers the protection your business needs. A
Frequently Asked Questions
What is chargeback management and why does it matter for eCommerce?
Chargeback management is the process of preventing, tracking, and responding to payment disputes filed by customers with their banks. It matters because chargebacks cost you the transaction amount plus fees (typically $20 to $100 per dispute), and high chargeback ratios can result in account termination or higher processing rates.
How can I reduce cart abandonment during the checkout process?
, before customers reach the payment page. Add trust signals like security badges and contact information. Offer guest checkout options and multiple payment methods. These changes address the main reasons customers leave without completing purchases.
What are the key features of an effective payment gateway for chargeback prevention?
Look for real-time dispute alerts, automated evidence submission tools, fraud scoring, and integration with prevention networks like Verifi or Ethoca. Next-day funding also helps by ensuring you have cash flow to manage disputes without financial strain.
When should I fight a chargeback versus issue a refund?
Fight chargebacks when you have strong evidence (delivery confirmation, customer communication, signed receipts) and the amount exceeds your cost to fight (typically $25 to $50 in staff time). Issue refunds for low-value disputes or when evidence is weak. Your win rate determines the right threshold for your business.
Which payment methods help reduce chargeback risk?
Digital wallets (Apple Pay, Google Pay) include biometric authentication that shifts fraud liability away from you. PayPal has its own dispute process that often resolves issues before they become chargebacks. Buy-now-pay-later services also handle disputes internally in many cases.
How can I build trust with customers during the checkout process?
Display SSL security badges near payment forms. Show accepted payment method logos clearly. Include visible contact information (phone number, email, chat) so customers can reach you with questions. Add brief return policy summaries and estimated delivery dates. These signals reassure customers and encourage direct contact over bank disputes.


