Payment Gateway Integration: Map Fields for Level 3 Rates
Last Updated on July 1, 2026 by Dimitri Akhrin
Configure tax, freight, and line-item fields to qualify B2B transactions for the lowest interchange tier
Learn exactly which data fields to map in your eCommerce platform so your payment gateway submits Level 3 detail on B2B orders. This step-by-step tutorial covers configuration, testing, and verification to help you reduce processing fees by up to 1%.
TL;DR
- Default eCommerce setups leave money on the table – Most platforms don’t send tax, freight, and line-item data to your gateway, causing every commercial card transaction to process at the highest interchange rate.
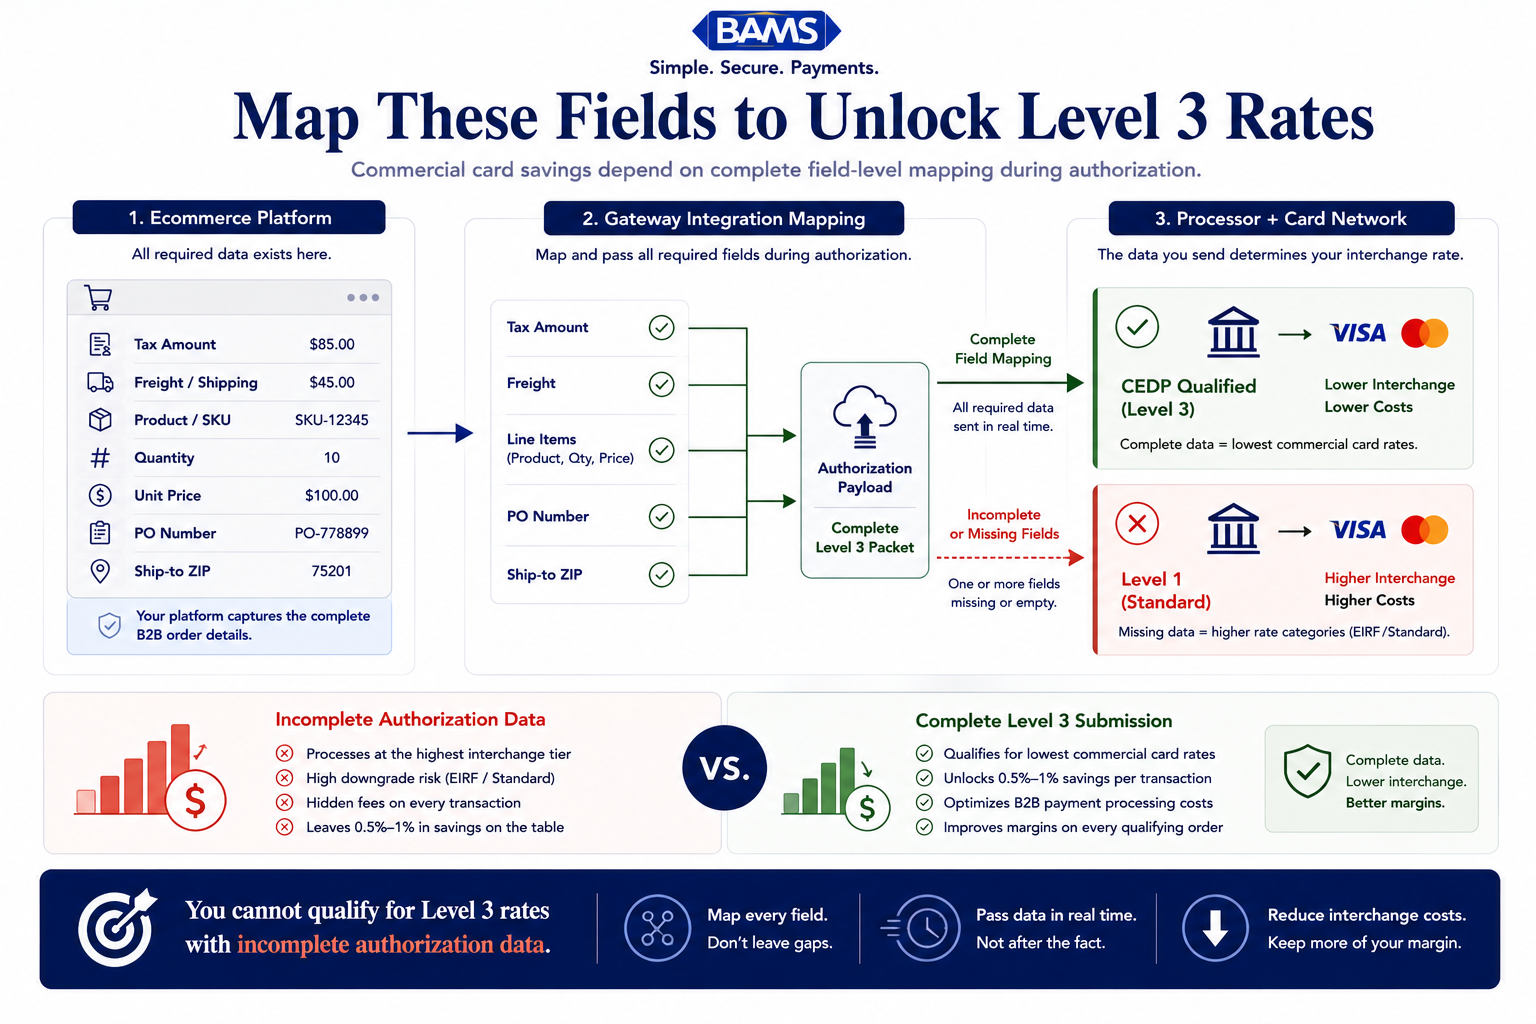
- Level 3 data must be sent at authorization – You cannot add enriched transaction data after the fact. Your platform, gateway plugin, and gateway must all be configured to pass this data in real time.
- Map three categories of fields – Order-level (tax amount, freight, ship-to ZIP), line-item (name, quantity, unit price, SKU), and customer reference (PO number). If you send any line-item data, all three core fields per item are required.
- Interchange-plus pricing is a prerequisite – On flat-rate pricing, Level 3 savings go to your processor, not you. Switch to interchange-plus so lower interchange rates translate directly to lower costs.
- Test with commercial cards and verify at settlement – Consumer cards won’t trigger Level 3 qualification. Run test orders with purchasing or corporate cards, then check your processor’s reporting to confirm the transaction qualified at Level 3.
What You’ll Achieve: Lower Interchange Rates Through Field-Level Mapping
By the end of this tutorial, you will have mapped the specific tax, freight, and line-item fields your eCommerce platform needs to pass through your payment gateway integration so that B2B card transactions qualify for Level 3 interchange rates. This can reduce payment processing fees by 0.5% to 1% on every qualifying commercial card order.
Your success criteria are concrete: you will see tax amount, freight amount, and line-item detail (product name, quantity, unit price) populated in your gateway’s transaction log for a live test order. If those fields appear, your transactions are positioned to qualify for the lowest available interchange tier.
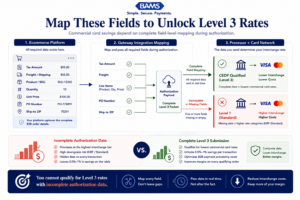
Level 3 savings do not come from negotiating rates. They come from sending complete transaction data at authorization.
Prerequisites and Setup Checklist
Before you start, confirm the following. Missing any one of these will block Level 3 qualification.
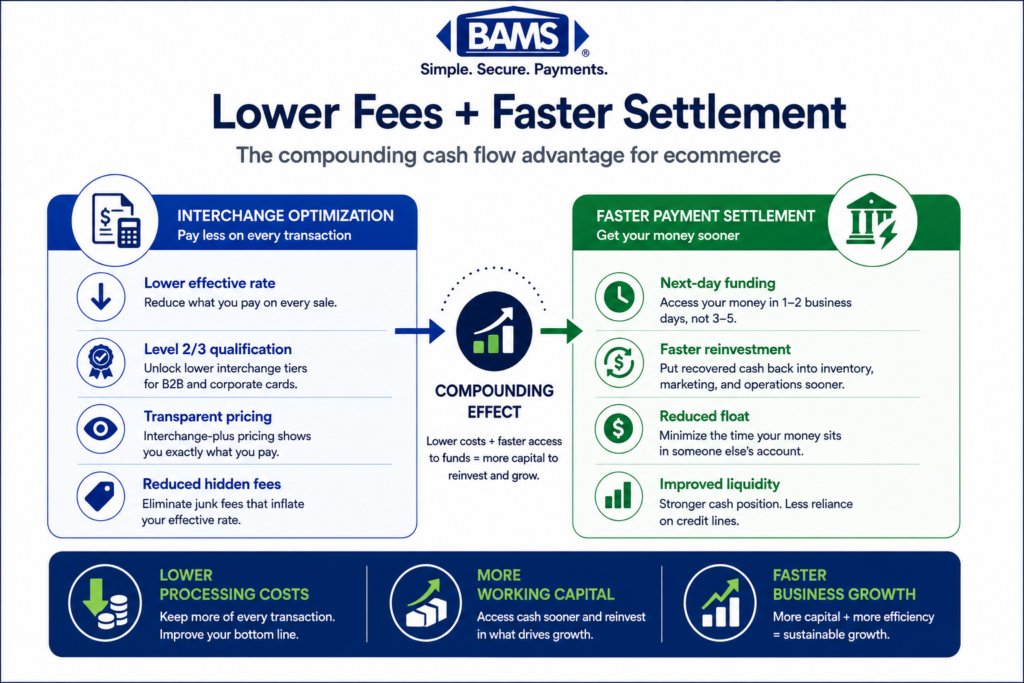
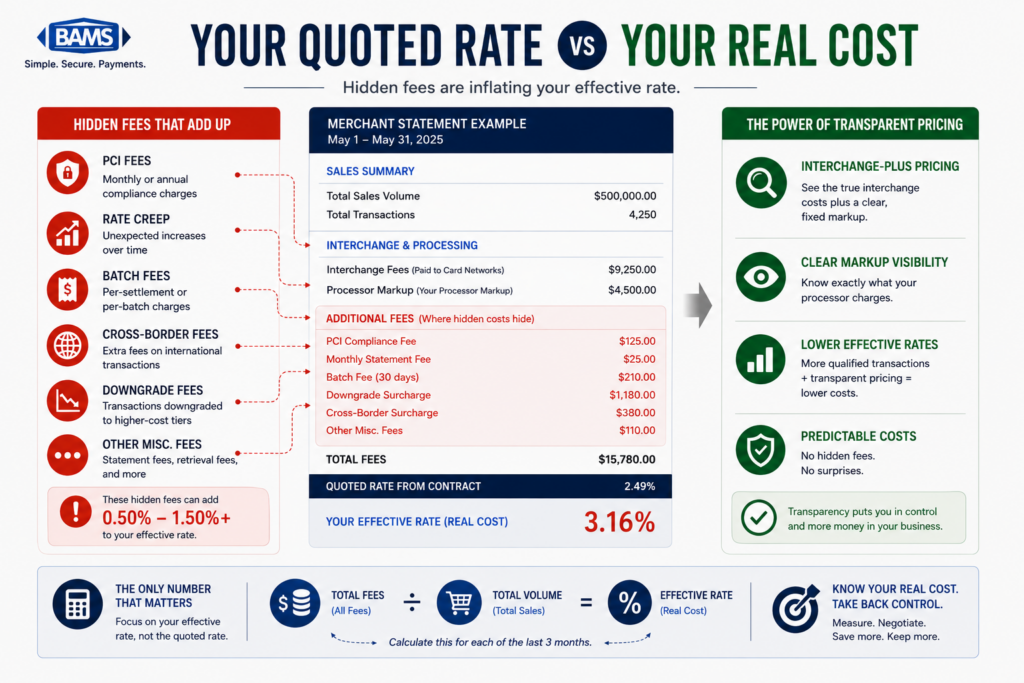
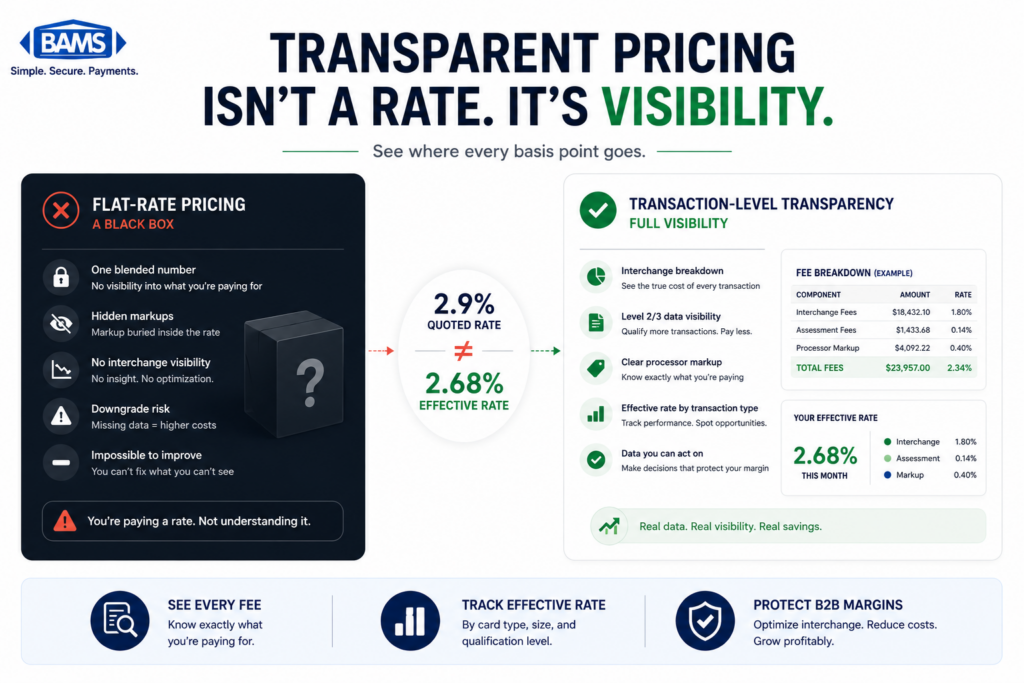
- Interchange-plus pricing on your merchant account. Flat-rate pricing absorbs interchange into a single rate, so Level 3 savings never reach you. If you’re unsure which model you’re on, review the factors that determine your processing costs and check your most recent statement.
- A gateway that supports Level 3 data fields. Not all gateways do. Confirm with your provider that their API accepts line-item detail, tax amount, and shipping amount at authorization time.
- Admin access to your eCommerce platform. You need to edit checkout settings, tax configuration, and shipping rules.
- A test commercial card (purchasing or corporate card). Level 3 rates apply to commercial cards, which represent 17% of U.S. card purchase volume. Consumer cards will not trigger Level 3 qualification regardless of the data you send.
- Time estimate: 2 to 4 hours for initial mapping, plus 1 to 2 days to verify qualification on live transactions.
Why Field-Level Mapping Matters (and Why Default Settings Fail)
Most eCommerce platforms connect to a payment gateway and call it done. The checkout works, cards get charged, and money arrives. But the transaction data your gateway actually sends to the card networks is often incomplete. Tax shows as $0.00. Freight is missing entirely. Line-item details never leave your platform.
This matters because card networks like Visa and Mastercard use that data to determine which interchange tier your transaction qualifies for. Visa payment rules and merchant guidance continue to emphasize the importance of enhanced transaction data and commercial card optimization for lower interchange qualification.
The approach here is gateway-agnostic. We focus on which fields to map, where to find them in common platforms, and how to verify they’re transmitting. This works whether you’re on Shopify Plus, WooCommerce, Magento, or BigCommerce.
Step-by-Step: Map Tax and Freight Fields for Level 3 Qualification
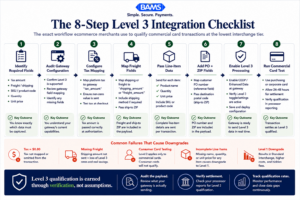
Most Level 3 failures are not pricing problems. They are incomplete integration and verification problems.
Step 1: Identify the Required Level 3 Fields
Before touching any settings, know exactly what data the card networks expect. Mastercard’s Level 3 documentation states that all Level 3 fields are technically optional, but if you provide any line-item data, you must include at least the item name, quantity, and unit price. Visa’s CEDP has similar requirements.
Here is the complete field list you need to map:
- Order-level fields: Tax amount, freight/shipping amount, order total, customer PO number (if available), ship-to ZIP code, merchant tax ID
- Line-item fields (per product): Item description/name, product code/SKU, quantity, unit of measure, unit price, extended amount (quantity × unit price), item tax amount
Checkpoint: Write down this field list. You will check each one off as you map it in the following steps.
Common failure: Mapping some line-item fields but not all three required ones (name, quantity, unit price). Partial line-item data can actually cause a transaction to fail Level 3 qualification entirely.
Step 2: Audit Your Current Gateway Configuration
Log into your payment gateway’s admin dashboard and locate the transaction detail for a recent order. Look at the raw data that was transmitted, not just the summary view.
What to look for: Find the fields labeled tax_amount, shipping_amount, line_items, or their equivalents in your gateway’s naming convention. If these fields are empty, null, or absent, your platform is not currently sending them.
Some gateways require you to explicitly enable Level 3 data. Mastercard commercial card acceptance research continues to highlight the growing importance of enriched transaction data and commercial card optimization for B2B merchants.
Checkpoint: You should now know (a) whether your gateway supports Level 3 fields and (b) whether your platform is currently populating them. If your gateway lacks Level 3 support entirely, you will need to switch gateways or add middleware before proceeding.
Step 3: Configure Tax Fields in Your eCommerce Platform
Your platform calculates tax, but that calculation needs to flow through to the gateway at authorization time. This is the critical constraint: Merchant Payments Coalition resources continue to highlight how transaction qualification failures and missing payment data create unnecessary processing costs for merchants.
For Shopify Plus: Tax is calculated at checkout by default, but Shopify’s standard gateway integration does not always pass it as a discrete field. You may need a custom checkout script or a Level 3 data app from the Shopify App Store that injects tax into the gateway payload.
For WooCommerce: Navigate to WooCommerce → Settings → Tax. Confirm tax is enabled and calculating correctly. Then check your gateway plugin’s settings for a “Send Line Items” or “Pass Level 3 Data” option. Many WooCommerce gateway plugins (such as those for Authorize.Net or NMI) have this setting buried under an “Advanced” tab.
For Magento / Adobe Commerce: Go to Stores → Configuration → Sales → Tax. Verify tax calculation is active. Then check Stores → Configuration → Sales → Payment Methods → [Your Gateway] for Level 2/3 data settings.
For BigCommerce: Tax settings are under Settings → Tax. BigCommerce’s native PayPal (Braintree) integration passes some Level 2 data, but Level 3 typically requires a third-party integration or a gateway that pulls line-item data via API.
Checkpoint: Place a test order and check your gateway log. The tax_amount field should now show a non-zero value matching the tax on the order.
Common failure: Tax displays correctly on the receipt but transmits as $0.00 to the gateway. This usually means the gateway plugin is not reading the tax object from your platform’s order data. Check plugin documentation for field mapping settings.
Step 4: Map Freight and Shipping Fields
Shipping/freight amount is one of the most commonly missing Level 3 fields. Many gateways receive the order total but not the shipping component broken out separately.
Action: In your gateway plugin or integration settings, look for a field labeled shipping_amount, freight_amount, or duty_amount. If your plugin has a field-mapping interface, map it to your platform’s shipping total.
If your plugin does not expose this field, you may need to use a code-level customization. Here is an example for a WooCommerce gateway plugin that supports custom fields via filter hooks:
add_filter(‘wc_gateway_level3_data’, function($data, $order) {
$data[‘shipping_amount’] = intval($order->get_shipping_total() * 100);
$data[‘ship_from_postal_code’] = ‘90210’; // Your warehouse ZIP
$data[‘ship_to_postal_code’] = $order->get_shipping_postcode();
return $data;
}, 10, 2);
Checkpoint: After placing another test order with a shipping charge, verify in the gateway log that shipping_amount appears with the correct value in cents (most gateways use minor units).
Common failure: Free shipping orders send $0.00 for freight. This is actually correct and will not disqualify the transaction. The field just needs to be present.
Step 5: Pass Line-Item Detail to the Gateway
This is the step where most integrations fall apart. Passing individual product names, quantities, SKUs, and unit prices requires your platform to serialize each cart item and include it in the authorization request.
Action: In your gateway plugin settings, enable “Send Line Items” or “Include Order Items.” If this option does not exist, check whether your gateway’s API documentation shows a line_items array in the authorization endpoint. You may need a developer to add this to the integration.
Here is the minimum data structure each line item needs:
{
“line_items”: [
{
“name”: “Industrial Widget A”,
“product_code”: “SKU-1234”,
“quantity”: 10,
“unit_of_measure”: “EA”,
“unit_price”: 2500,
“total_amount”: 25000,
“tax_amount”: 2063
}
]
}
Note that unit_price and total_amount are typically in cents. The product_code should be your SKU or, ideally, a commodity code if you have one.
Checkpoint: Place a multi-item test order. In your gateway log, each line item should appear with name, quantity, and unit price populated. If any of these three are missing on any item, the entire transaction may fail Level 3 qualification.
Common failure: Bundled or variable products send a parent SKU with quantity 1 instead of the individual components. Check how your platform serializes bundle/composite products and adjust the mapping accordingly.
Step 6: Add Customer PO Number and Ship-To ZIP
Two fields that significantly improve qualification rates are the customer purchase order number and the ship-to postal code. These are often available in your order data but not mapped to the gateway.
Customer PO number: If your B2B checkout includes a PO field (common in wholesale and B2B storefronts), map it to your gateway’s customer_reference or po_number field. If your checkout doesn’t have a PO field, consider adding one. On WooCommerce, a simple custom checkout field plugin works. On Shopify Plus, use checkout UI extensions.
Ship-to ZIP: This is almost always available from the shipping address. Map shipping_postcode from your platform to destination_postal_code in your gateway payload.
Checkpoint: Verify both fields appear in your next test transaction’s gateway log.
Step 7: Enable Level 3 Processing in Your Gateway Dashboard
Even after your platform sends all the right data, your gateway may not forward it to the processor unless Level 3 processing is explicitly enabled. This is a separate toggle from the data fields themselves.
Action: Log into your gateway dashboard. Navigate to the settings or configuration area. Look for options labeled “Level 2/Level 3 Processing,” “Enhanced Data,” or “Commercial Card Optimization.” Enable it.
If you cannot find this setting, contact your gateway provider and ask: “Is Level 3 data submission enabled on my account?” Some gateways require a backend flag that only their support team can activate.
Checkpoint: After enabling, your gateway should now indicate the processing level on each transaction (Level 1, Level 2, or Level 3). This is usually visible in the transaction detail or reporting section.
Step 8: Run a Live Test With a Commercial Card
Consumer cards will not trigger Level 3 qualification. You need to test with an actual purchasing card or corporate card.
Action: Place a real order using a commercial Visa or Mastercard. Include at least two line items, a shipping charge, and applicable tax. If your checkout has a PO field, fill it in.
What to check after the transaction settles (typically 24 to 48 hours):
- In your gateway log: all Level 3 fields populated
- In your processor’s reporting: the transaction should show as “Level 3” or “CEDP qualified”
- On your next statement: the interchange rate for that transaction should be lower than your standard commercial card rate
Common failure: The gateway shows all fields populated, but the processor still downgrades the transaction. This can happen if your merchant category code (MCC) is not eligible or if the card type does not qualify. Contact your processor to investigate.
Configuration and Customization
Not every field value is one-size-fits-all. Here are the key variables you should adjust for your business:
- Unit of measure: Default is usually “EA” (each). If you sell by weight, length, or volume, update to the appropriate unit code per Mastercard’s documentation (e.g., “LB” for pounds, “GAL” for gallons).
- Ship-from postal code: Use your warehouse or fulfillment center ZIP, not your corporate headquarters, if they differ.
- Tax indicator: Some gateways require a tax indicator flag (Y/N/Exempt). Set this based on whether the order is taxable. Tax-exempt B2B orders should pass “Exempt” rather than leaving the field blank.
- Product codes: SKUs work, but UNSPSC commodity codes improve qualification rates. If you sell standardized products, consider adding commodity codes to your product catalog.
Safe defaults: Unit of measure = “EA”, tax indicator = “Y” for taxable orders, product code = your SKU. Must-change settings: Ship-from ZIP (must match your actual shipping origin) and tax amount (must match the actual calculated tax, not a placeholder).
Verification and Testing
A single successful test order is not enough. Run at least five transactions across different scenarios to confirm consistent qualification:
- Single-item order with tax and shipping
- Multi-item order with mixed tax rates
- Order with free shipping ($0.00 freight)
- Tax-exempt order
- Order with a customer PO number
For each transaction, verify in your gateway log that all Level 3 fields are populated. Then wait for settlement and check your processor’s reporting for the qualification level. If even one required field is missing on any transaction, that order reverts to Level 1 rates.
If your processor is on interchange-plus pricing, you can compare the interchange line item on qualifying versus non-qualifying transactions to see the exact savings per order.
Common Errors and Fixes
Error: “Tax amount does not match order total minus subtotal”
Symptom: Gateway rejects the Level 3 data or the transaction downgrades. Cause: Rounding differences between your platform’s tax calculation and the values sent to the gateway. Fix: Ensure your gateway plugin uses the same rounding method as your tax engine. Most gateways expect amounts in integer cents, so verify no floating-point truncation is occurring.
Error: Line items present but transaction qualifies as Level 1
Symptom: All fields appear in the gateway log, but the processor reports Level 1. Cause: The card used is a consumer card, not a commercial card. Level 3 rates only apply to purchasing, corporate, and business cards. Fix: Retest with a confirmed commercial card. Your ongoing savings will come from the portion of your transactions paid with commercial cards.
Error: “Line item total does not match order total”
Symptom: Transaction processes but downgrades. Cause: The sum of all line-item extended amounts plus tax plus freight does not equal the authorized total. Discounts, coupons, or store credits can create mismatches. Fix: Add a discount line item with a negative amount, or adjust line-item prices to reflect the post-discount price.
Error: Gateway does not show Level 3 fields at all
Symptom: No Level 3 data appears in the transaction log despite configuring your platform. Cause: Your gateway plugin sends data in a standard payload that does not include the Level 3 extension. Fix: Confirm your gateway plugin version supports Level 3. If not, you may need a different plugin, a middleware solution, or a gateway that natively supports enriched data. A merchant services partner like BAMS can help you evaluate whether your current gateway and processor combination supports Level 3 qualification, and their dedicated account managers can walk through your specific integration.
Error: Freight field missing on digital/downloadable orders
Symptom: Digital product orders do not pass freight data. Cause: No shipping method is applied to virtual orders, so the field is omitted entirely. Fix: Pass shipping_amount: 0 explicitly rather than omitting the field. The field must be present even when the value is zero.
Next Steps and Extensions
Once your Level 3 field mapping is live and verified, consider these follow-on actions to further reduce processing costs across your operation:
- Audit your full interchange qualification mix. Pull a month of transaction data and categorize by qualification level. This tells you what percentage of revenue is benefiting from your new mapping and where gaps remain.
- Add commodity codes to your product catalog. Replacing generic SKUs with UNSPSC codes improves qualification consistency, especially for government and large enterprise purchasing cards.
- Extend Level 3 mapping to other sales channels. If you sell through marketplaces, phone orders, or invoicing systems, each channel needs its own field mapping. The same principles apply.
- Review your overall eCommerce merchant services setup to ensure your processor, gateway, and pricing model are aligned to capture every available savings tier.
Frequently Asked Questions
What are the best strategies to reduce payment processing fees?
The most impactful strategy for B2B merchants is optimizing transaction data to qualify for lower interchange tiers. This means passing Level 3 data (tax, freight, line-item detail) through your gateway at authorization time. Beyond that, ensure you’re on interchange-plus pricing so savings actually reach your bottom line, minimize chargebacks, and encourage payment methods with lower interchange categories.
Why is interchange-plus pricing more beneficial than flat-rate pricing?
Flat-rate pricing charges the same percentage regardless of card type or data quality. Interchange-plus passes the actual interchange cost through to you, plus a fixed markup. This means when you qualify for lower interchange rates (through Level 3 data, for example), your effective rate drops. On flat-rate pricing, those savings go to your processor, not to you.
How does optimizing transaction data affect processing fees?
Card networks assign interchange rates partly based on the richness of transaction data. Transactions with complete tax, freight, and line-item detail (Level 3) receive lower interchange rates than transactions with only basic authorization data (Level 1). Industry estimates suggest Level 3 qualification can reduce processing fees by 0.5% to 1% per transaction on commercial cards.
How can I audit my payment processing statements for hidden fees?
Start by requesting an interchange qualification report from your processor. This shows what percentage of your transactions qualified at each level. If most transactions show “Standard” or “EIRF” (Electronic Interchange Reimbursement Fee), you’re paying elevated rates due to missing data. Compare the interchange rate on each transaction against published card network rate tables to spot overcharges.
Do Level 3 data requirements apply to all card types?
No. Level 3 interchange savings apply specifically to commercial cards (purchasing cards, corporate cards, business cards). Consumer credit and debit cards have their own interchange tiers that are not influenced by Level 3 data. Since commercial cards represent a significant share of B2B payment volume, the savings can be substantial for merchants with business customers.
Can I add Level 3 data after a transaction has been authorized?
No. The enriched data must be included in the authorization request at the moment the transaction is processed. You cannot retroactively add tax, freight, or line-item detail to a transaction that has already been authorized. This is why configuring your platform and gateway to send this data in real time is essential.
Sources
- https://na-gateway.mastercard.com/api/documentation/integrationGuidelines/supportedFeatures/pickAdditionalFunctionality/levelIIAndIIIData/index.html
- https://www.mastercard.com/us/en/news-and-trends/Insights/2025/the-state-of-commercial-card-acceptance-2025.html
- https://merchantspaymentscoalition.com/issues
- https://www.federalreserve.gov/publications/files/consumer-payment-report-2023.pdf