Credit Card Optimization: A Gateway-Level Guide
Last Updated on October 14, 2026 by Dimitri Akhrin
How to audit your payment gateway data and unlock lower interchange rates without replacing your tech stack
Learn how transaction data tiers determine your interchange rates and how to audit what your gateway already captures. This guide walks you through moving from Level 1 to Level 2 or Level 3 processing using your existing setup.
TL;DR
- Your processing statement hides interchange waste – It shows totals, not why individual transactions qualified at the rate they did. Transaction-level data reveals the real story.
- You probably process commercial cards without knowing it – If you sell anything businesses buy, corporate purchasing cards and business credit cards are in your mix, and they’re eligible for lower interchange rates with better data.
- Moving up a data tier is a gateway configuration task, not a tech overhaul – Most modern gateways already support Level 2 and Level 3 fields. Your checkout already collects most of the required data. The fix is connecting the two.
- Start with Level 2 for the fastest impact – Adding tax amount, postal code, and a customer code to your gateway submission captures the majority of available savings with minimal effort.
- Validation and monitoring are non-negotiable – Submitting enhanced data doesn’t guarantee lower rates. Verify interchange qualification after settlement and check monthly for regressions caused by platform updates.
Guide Orientation: What This Guide Covers and Who It’s For
This guide is about credit card optimization at the gateway level, specifically the gap between what your processing statement reports and what your payment gateway actually captures (or fails to capture) on every transaction. It’s written for eCommerce managers at established online businesses who process a mix of consumer and commercial card transactions and suspect they’re overpaying on interchange without a clear way to diagnose why.
By the end, you’ll understand how transaction data tiers work, how to audit what your gateway is already sending to card networks, and how to move from Level 1 to Level 2 or Level 3 processing without replacing your tech stack. This guide does not cover ERP integration projects, government procurement workflows, or enterprise-scale B2B optimization. It focuses on the practical starting point that most content skips entirely.
Why Credit Card Optimization Starts with Data You Already Have
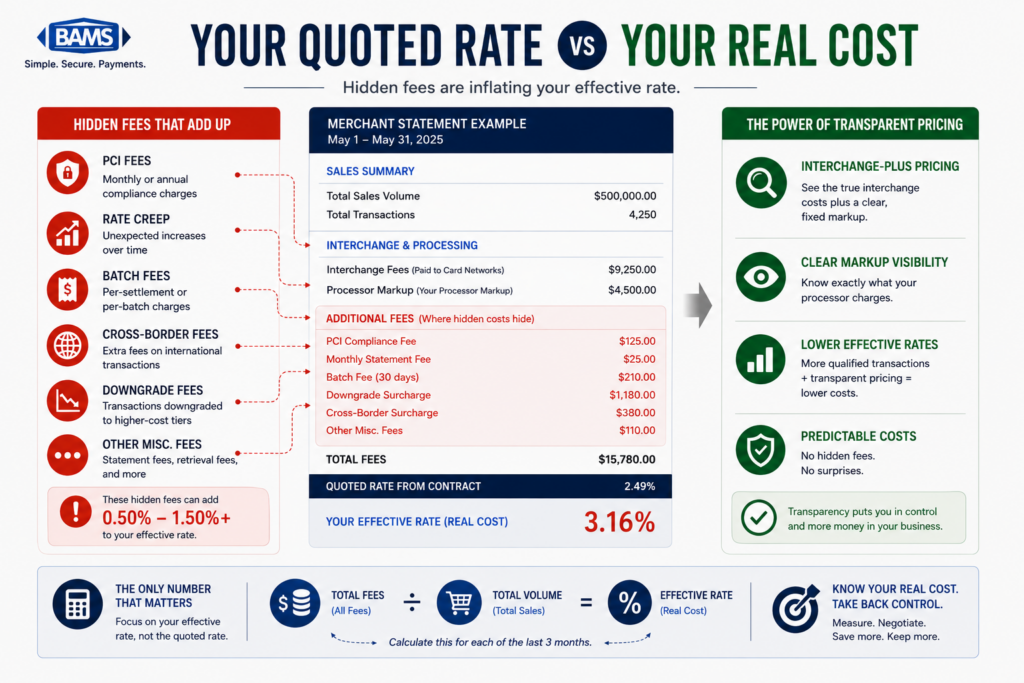
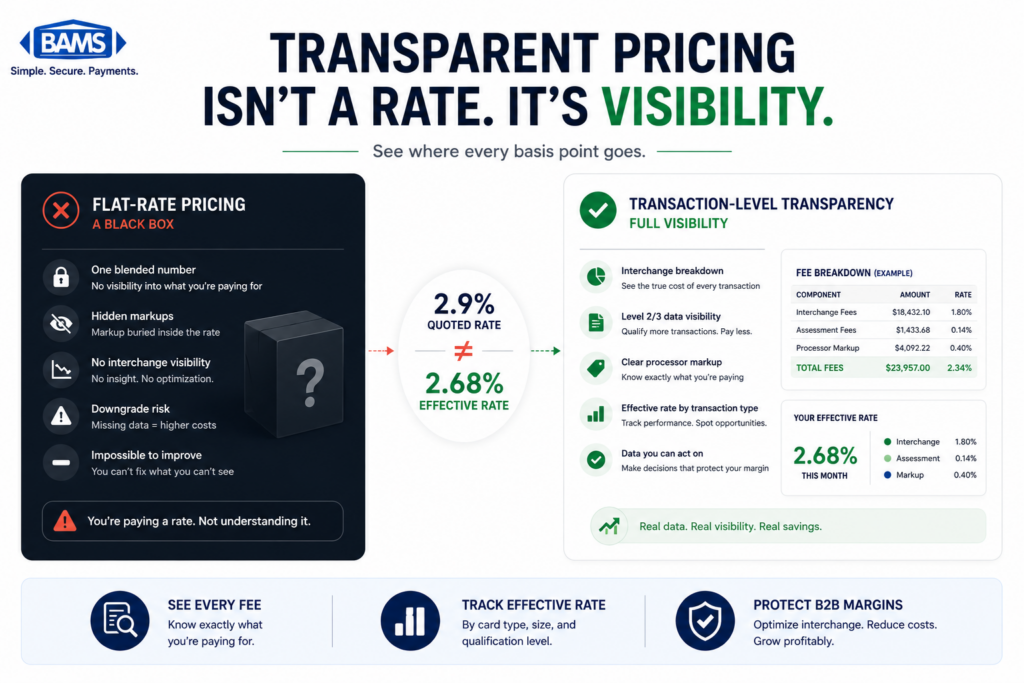
Most eCommerce businesses treat their processing statement as the definitive record of what they pay. It shows gross volume, transaction counts, fees, and a total. What it doesn’t show is why individual transactions qualified at the interchange rate they did, or whether a different rate was available if more data had been submitted.
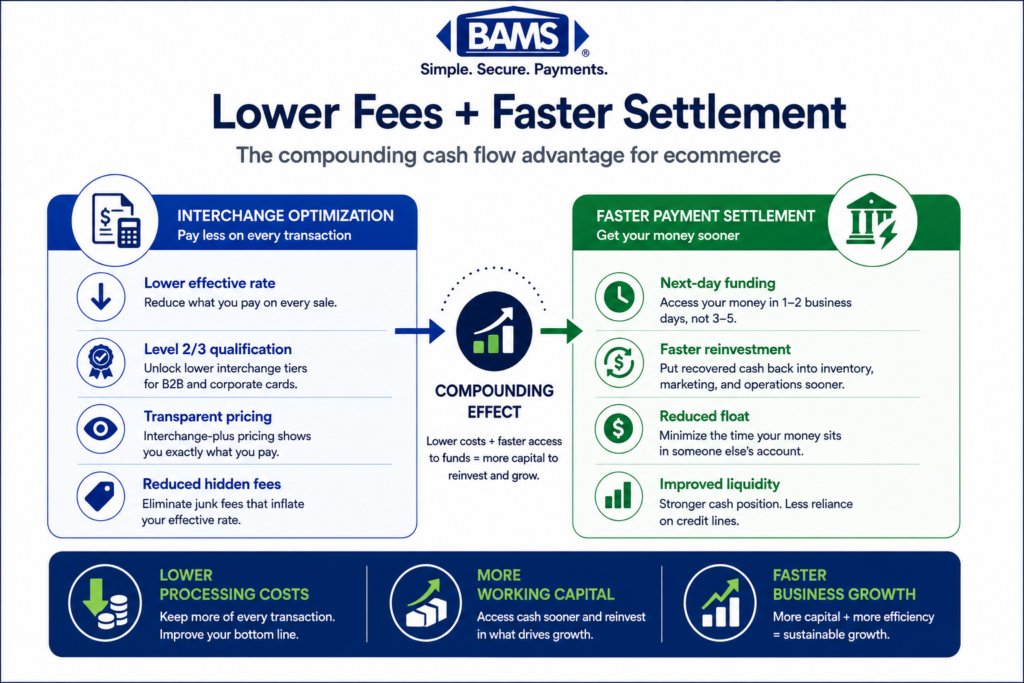
This matters because interchange fees are not fixed. Visa and Mastercard set hundreds of interchange categories, and the rate your transaction lands in depends heavily on the data attached to it. A commercial purchasing card transaction submitted with only basic authorization data (Level 1) can cost 50 to 80 basis points more than the same transaction submitted with invoice-quality data (Level 3). For a business processing even modest commercial card volume, that gap compounds into thousands of dollars annually.
The cost of inaction is not dramatic. It’s quiet. According to the Federal Reserve’s 2025 Small Business Credit Survey, managing operating expenses remains a significant challenge for many businesses, making payment cost optimization increasingly important. You don’t get a notification when a transaction qualifies at a higher rate than necessary. Your statement doesn’t flag the difference. And because most processors don’t break out interchange qualification at the transaction level, the overpayment hides in plain sight. As card networks continue tightening transaction-level payment analytics requirements and phasing out legacy data tiers, the merchants who understand their data gap now will pay less than those who wait.
Core Concepts: Data Tiers, Interchange Qualification, and the Gateway’s Role
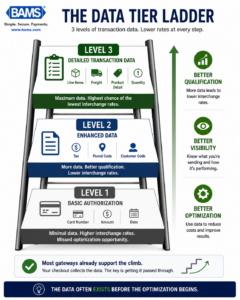
Moving to lower interchange rates is often a configuration project, not a technology replacement.
The Three Data Tiers
Every card-present or card-not-present transaction carries data. Card networks evaluate that data and assign an interchange rate based on how much detail is included. The three tiers work like this:
- Level 1: Basic authorization data. Card number, expiration, transaction amount, date. This is the minimum for any transaction to process. Consumer transactions typically qualify here.
- Level 2: Adds tax amount, merchant postal code, and customer code (often a PO number). This tier reduces interchange on commercial and corporate cards.
- Level 3: Adds line-item detail: item descriptions, quantities, unit costs, commodity codes, freight amounts. This is invoice-quality data, and it unlocks the lowest available interchange rates on eligible commercial card transactions.
Why Your Gateway Matters More Than Your Processor
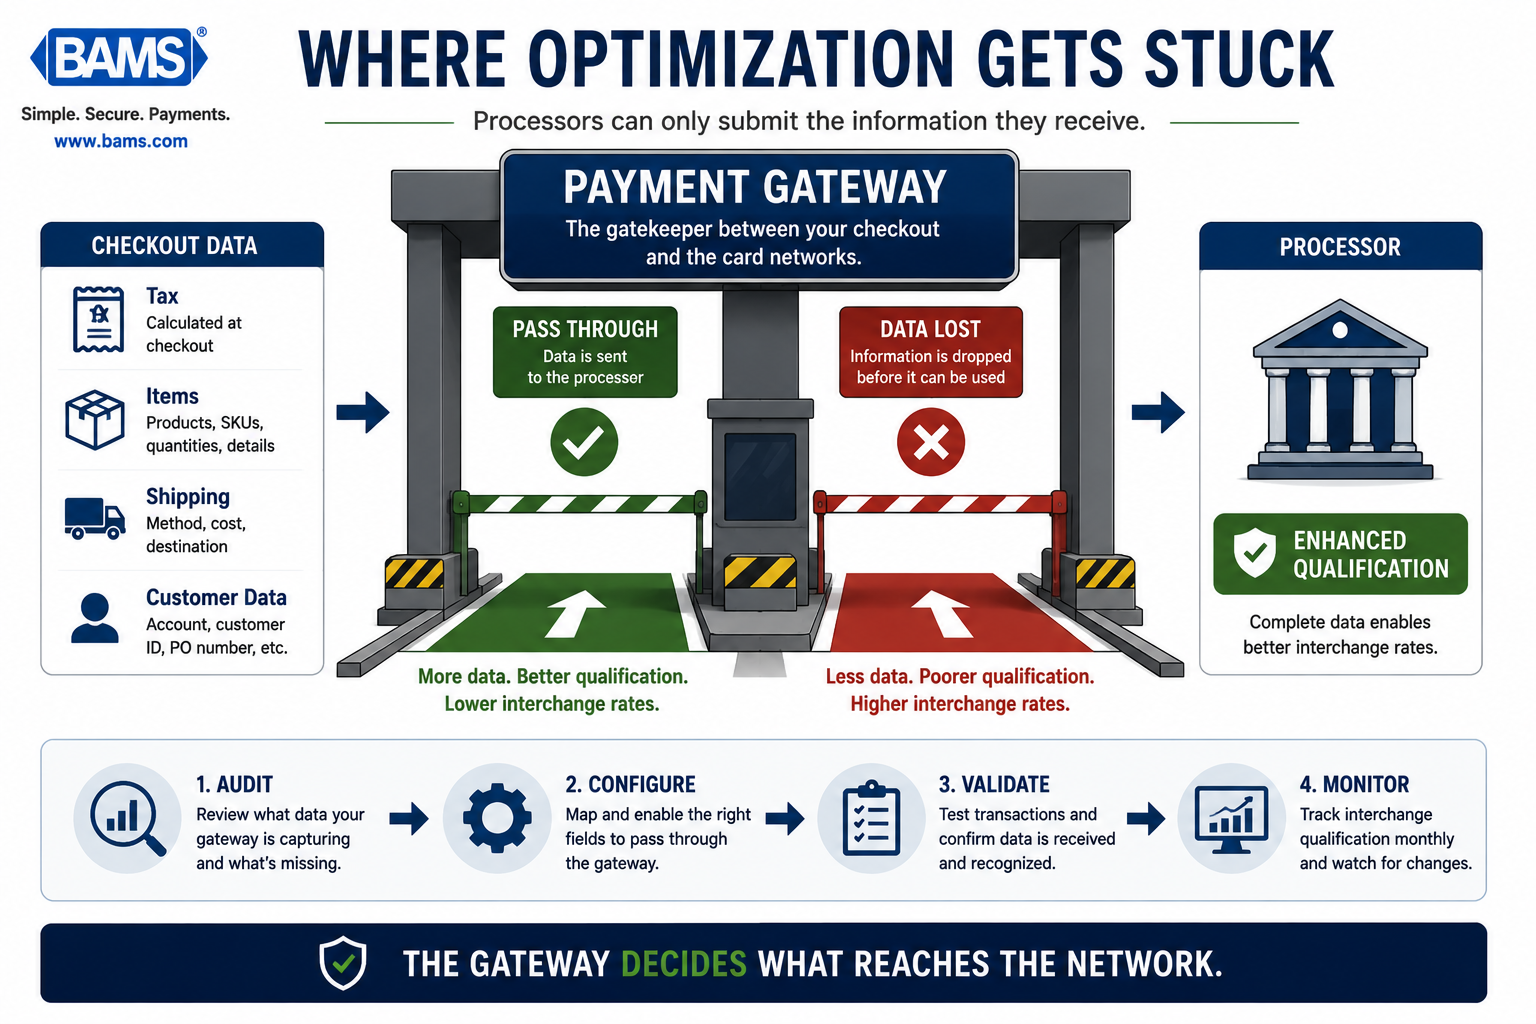
Your payment processor submits whatever data your gateway sends. If your gateway only passes Level 1 fields, your processor cannot upgrade the transaction. The gateway is the bottleneck, not the processor. Visa’s payment processing guidance emphasizes the importance of complete transaction information throughout the payment lifecycle, reinforcing the role gateways play in successful qualification.
Most modern eCommerce gateways support Level 2 and Level 3 fields. The question is whether those fields are configured and populated in your checkout flow.
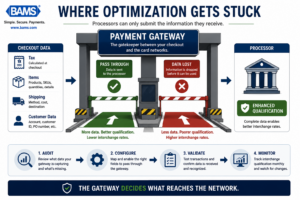
Processors can only submit the information they receive.
The Misconception About “B2B Only”
Nearly all existing guidance frames Level 3 credit card processing as a B2B or B2G concern. That framing misses a critical reality: many eCommerce businesses selling directly to consumers also receive orders paid with corporate purchasing cards, business credit cards, and government cards. If you sell office supplies, equipment, software, or services that businesses buy, you likely process commercial cards without realizing it. Every one of those transactions is a candidate for interchange savings you’re currently leaving on the table.
The Framework: Audit, Configure, Validate, Monitor
Moving up a data tier is not an integration project. It’s a four-phase configuration exercise. Here’s the high-level structure:
- Phase 1 — Audit: Identify what your gateway currently captures and submits. Determine what percentage of your transactions involve commercial cards.
- Phase 2 — Configure: Enable Level 2 and Level 3 fields in your gateway settings. Map your existing order data (tax, line items, shipping) to the required fields.
- Phase 3 — Validate: Confirm that enhanced data is actually reaching the card networks and that transactions are qualifying at lower interchange rates.
- Phase 4 — Monitor: Establish ongoing visibility into interchange qualification so you catch regressions and continue optimizing.
Each phase builds on the previous one. The critical insight is that Phase 1 (the audit) often reveals you already have most of the data you need. Your checkout flow collects tax amounts, item details, and shipping information. Your gateway just isn’t forwarding it.
Step-by-Step: How to Close the Data Gap Without Replacing Your Tech Stack
Step 1: Run a Commercial Card Audit on Your Transaction History
Objective: Determine what percentage of your transactions come from commercial, corporate, or purchasing cards, and how much interchange you’re paying on them.
Your processing statement won’t break this out clearly. That’s the core problem. Statements typically aggregate interchange into broad categories or roll everything into a single effective rate. To see what’s actually happening, you need transaction-level data. Request a raw transaction report from your processor or gateway that includes the card type (consumer vs. commercial), the interchange category each transaction qualified under, and the rate applied.
Look specifically for transactions flagged as “Commercial,” “Corporate,” “Purchasing,” or “Business” card types. Then check the interchange qualification level. If commercial card transactions are qualifying at standard or mid-qualified rates rather than Level 2 or Level 3 rates, you’ve found the gap. For context on what to look for, the signals outlined in this guide to processing statement analysis provide a useful diagnostic checklist.
Anti-patterns: Don’t rely on your monthly statement summary. Don’t assume you have no commercial card volume just because you sell to consumers. Businesses buy from consumer-facing stores constantly.
Success indicator: You can state, with data, what percentage of your volume is commercial and what interchange rate those transactions currently qualify at.
Step 2: Map Your Existing Order Data to Level 2 and Level 3 Fields
Objective: Identify which required data fields your checkout already collects and which ones are missing.
Level 2 requires three additional fields beyond basic authorization: tax amount, merchant postal code, and customer code. Level 3 adds line-item detail: item description, product code, quantity, unit of measure, unit cost, extended amount, commodity code, and discount amount.
That sounds like a lot, but examine your order data closely. Your cart already captures item names, quantities, unit prices, and tax. Your shipping module captures postal codes. Much of the Level 3 dataset is sitting in your order object, unused by your gateway. The Visa Commercial Enhanced Data Program highlights how enhanced transaction data supports commercial card qualification and improved interchange outcomes.
Create a simple mapping document: list every Level 2 and Level 3 field on one side, and the corresponding field in your eCommerce platform’s order schema on the other. Identify true gaps (fields you don’t collect at all) versus configuration gaps (fields you collect but don’t pass to the gateway). The distinction matters because configuration gaps require settings changes, not development work.
Anti-patterns: Don’t start by reading Visa’s 80-page technical specification. Start with your own order data and work backward to the requirements. Don’t assume you need every optional field. Focus on the fields that drive qualification.
Success indicator: A completed mapping document showing which Level 2/3 fields are already available in your order data and which require new collection or configuration.
Step 3: Check Your Gateway’s Enhanced Data Support
Objective: Confirm whether your current payment gateway supports Level 2 and Level 3 data submission, and how to enable it.
Most modern eCommerce gateways (Authorize.Net, Braintree, Stripe, NMI, and others) support Level 2 and Level 3 fields in their API. But payment gateway support doesn’t mean the feature is enabled by default. In many cases, enhanced data fields exist in the API but are not populated unless you explicitly configure your integration to include them. Some gateways offer a dashboard toggle. Others require passing additional parameters in your payment request.
Check your gateway’s developer documentation for “Level 2” and “Level 3” or “enhanced data” support. If you use a hosted checkout or a plugin (like a Shopify or WooCommerce payment module), check whether the plugin exposes Level 2/3 fields or suppresses them. Some plugins strip enhanced data because they were built for consumer-only use cases. This is one of the most common reasons eCommerce merchants unknowingly submit transactions at Level 1 even when their gateway technically supports more.
Anti-patterns: Don’t assume your gateway doesn’t support enhanced data just because you’ve never used it. Don’t confuse “our plugin doesn’t support it” with “our gateway doesn’t support it.” These are different layers.
Success indicator: You know exactly which enhanced data fields your gateway supports, whether your current integration passes them, and what configuration change is needed to enable them.
Step 4: Configure and Test Enhanced Data Submission
Objective: Enable Level 2 and Level 3 data fields in your gateway integration and verify they’re being transmitted correctly.
Start with Level 2. It requires the fewest changes and delivers meaningful interchange savings on commercial card transactions. Add the tax amount and customer code fields to your payment request. For most eCommerce setups, the tax amount is already calculated at checkout, so this is a matter of including it in the gateway API call. The customer code field can be populated with the order number or a PO number if your checkout collects one.
Once Level 2 is working, move to Level 3 if your volume justifies it. This means passing line-item arrays in your payment request: one entry per item with description, quantity, unit cost, and commodity code. Test with a few transactions using a commercial card (if you have access to one) and check the gateway’s transaction detail to confirm the enhanced fields were submitted. Some gateways show a “Level” indicator in the transaction record.
For merchants who want automated data capture without custom development, tools like BAMS can help configure enhanced data submission as part of their merchant services setup, particularly for businesses that lack in-house developer resources.
Anti-patterns: Don’t try to jump straight to Level 3 without confirming Level 2 works first. Don’t hard-code test values. Use real order data from your platform so you’re validating the actual data flow, not a simulation.
Success indicator: Test transactions show Level 2 or Level 3 data in the gateway’s transaction detail, and no errors are returned on the enhanced data fields.
Step 5: Validate Interchange Qualification on Live Transactions
Objective: Confirm that enhanced data submission is actually resulting in lower interchange rates, not just being sent into a void.
This is the step most guides skip, and it’s where many merchants get stuck. Submitting enhanced data does not guarantee a lower interchange rate. The card networks evaluate the data for completeness and accuracy. If a required field is missing, malformed, or contains a default value, the transaction may still qualify at a higher rate. Validation requires checking the actual interchange category assigned to each transaction after settlement.
Request a post-settlement interchange qualification report from your processor. Compare the interchange categories on commercial card transactions before and after you enabled enhanced data. Look for downgrades (transactions that should have qualified at a lower rate but didn’t). Common causes of downgrades include missing tax indicators, invalid commodity codes, or settlement delays beyond the network’s window.
Small configuration changes can produce meaningful results when interchange qualification depends on complete and accurate transaction data. Because qualification criteria are binary, even a single missing field can prevent an otherwise eligible transaction from receiving a lower interchange rate. The same principle applies here: minor data-field corrections often produce outsized interchange savings because the qualification thresholds are binary. You either meet them or you don’t.
Anti-patterns: Don’t assume enhanced data is working just because your gateway accepted it. Don’t wait three months to check. Validate within the first billing cycle.
Success indicator: Commercial card transactions are qualifying at Level 2 or Level 3 interchange rates, and you can quantify the per-transaction savings compared to your baseline.
Step 6: Build Ongoing Monitoring into Your Payment Operations
Objective: Establish a repeatable process to catch interchange regressions, platform updates that break data submission, and new optimization opportunities.
Interchange qualification is not a one-time fix. Gateway updates, platform plugin changes, and card network rule revisions can all cause previously qualifying transactions to regress to higher rates. You need a monitoring cadence. Monthly is sufficient for most businesses.
Set up a simple tracking process: each month, pull your interchange qualification report and check the percentage of commercial card transactions qualifying at Level 2 or Level 3. Track the effective rate on commercial cards separately from consumer cards. If the rate creeps up, investigate whether a platform update changed the data being passed. A consultant analysis by The Lab Consulting found that operations teams routinely miss data on rejected payments, rejected addresses, and electronic kickbacks because they measure throughput but not data quality. The same blind spot applies to interchange qualification.
If transaction-level monitoring feels burdensome, this is where a dedicated merchant services partner adds value. BAMS, for example, provides ongoing payment analytics that surface interchange qualification issues proactively rather than waiting for you to discover them on a statement.
Anti-patterns: Don’t treat enhanced data as a “set and forget” configuration. Don’t rely solely on your processor’s summary statement to monitor qualification. It lacks the granularity you need.
Success indicator: You have a monthly review process that tracks commercial card interchange rates and flags regressions within one billing cycle.
Practical Example: The Office Supply eCommerce Store
Consider an online office supply retailer doing $1.2 million in annual card volume. About 18% of orders are placed by office managers using corporate purchasing cards. That’s $216,000 in commercial card volume. At Level 1 qualification, those transactions might incur an average interchange rate of 2.65%. And at Level 2, the rate drops to roughly 2.15%. At Level 3, it could fall to around 1.85%.
The difference between Level 1 and Level 3 on $216,000 is approximately $1,728 per year. Not transformative, but not trivial for a business watching margins. And the fix didn’t require a new gateway, a new processor, or an ERP integration. It required enabling fields the gateway already supported and populating them with data the cart already collected.
Now consider the same retailer doesn’t know 18% of their volume is commercial. Their statement doesn’t flag it. Their processor doesn’t mention it. They’re paying $1,728 more per year in interchange and have no visibility into the cause. That’s the story this guide exists to change.
Common Mistakes and Pitfalls
- Assuming “we don’t do B2B” means no commercial cards: If you sell anything businesses buy, you receive commercial cards. Office supplies, electronics, software, bulk consumables. Check your data before making assumptions.
- Confusing gateway capability with gateway configuration: Your gateway may support Level 3. Your integration may not be using it. These are different problems with different solutions.
- Submitting incomplete enhanced data and assuming it worked: Partial data can still result in a downgrade. Validation (Step 5) is not optional.
- Over-investing in Level 3 when Level 2 delivers most of the savings: For many small-to-midsize merchants, Level 2 captures the majority of available interchange reduction with far less complexity. Start there.
- Ignoring ongoing monitoring: Platform updates and gateway changes can silently break enhanced data submission. A quarterly or monthly check prevents silent cost creep.
What to Do Next
Start with Step 1. Request a transaction-level report from your processor or gateway and find out what percentage of your volume involves commercial cards. That single data point tells you whether the rest of this guide applies to your business. If commercial cards represent even 10% of your volume, the configuration work in Steps 2 through 4 is worth your time.
You don’t need to complete every step in a single sprint. Enable Level 2 first. Validate it’s working. Then decide whether Level 3 justifies the additional mapping effort based on your actual commercial card volume. Revisit this guide as a reference when you’re ready for each phase. The goal is incremental, verified progress, not a one-time overhaul that nobody monitors afterward.
Frequently Asked Questions
What is Level 3 data in merchant services?
Level 3 data is invoice-quality transaction detail submitted to card networks alongside a payment authorization. It includes line-item information like item descriptions, quantities, unit costs, commodity codes, and freight amounts. When this data is submitted on eligible commercial card transactions, the card networks assign a lower interchange rate because the additional detail reduces fraud risk and simplifies reconciliation for the card-issuing bank.
Do Level 2 and Level 3 data only apply to B2B businesses?
No. Any merchant who receives payments from corporate purchasing cards, business credit cards, or government cards can benefit. Many consumer-facing eCommerce stores receive commercial card orders from office managers, procurement teams, or small business buyers without realizing it. The savings apply to the card type, not your business model.
What specific data fields are required for Level 2 and Level 3 processing?
Level 2 requires three fields beyond standard authorization: tax amount, merchant postal code, and a customer code (typically an order or PO number). Level 3 adds line-item arrays including item description, product code, quantity, unit of measure, unit cost, extended amount, commodity code, and discount amount. Most eCommerce platforms already collect this information at checkout.
Will I need to replace my payment gateway to submit enhanced data?
In most cases, no. The majority of modern eCommerce gateways already support Level 2 and Level 3 fields in their APIs. The issue is usually configuration, not capability. Your gateway may support the fields, but your integration (or plugin) may not be populating them. Check your gateway’s documentation for “enhanced data” or “Level 2/3” support before assuming a switch is necessary.
How much can I actually save by moving from Level 1 to Level 2 or Level 3?
Savings depend on your commercial card volume and the interchange categories involved. As a general benchmark, Level 2 can reduce interchange by 30 to 50 basis points per transaction on eligible commercial cards, and Level 3 can reduce it by 50 to 80 basis points compared to Level 1. On $200,000 in annual commercial card volume, that translates to roughly $1,000 to $1,600 in annual savings.
How do I know if my enhanced data is actually working?
Submitting enhanced data fields does not guarantee a lower interchange rate. You need to check the actual interchange qualification category assigned to each transaction after settlement. Request a post-settlement interchange report from your processor and compare the rates on commercial card transactions before and after enabling enhanced data. If transactions are still qualifying at standard rates, a required field may be missing or malformed.