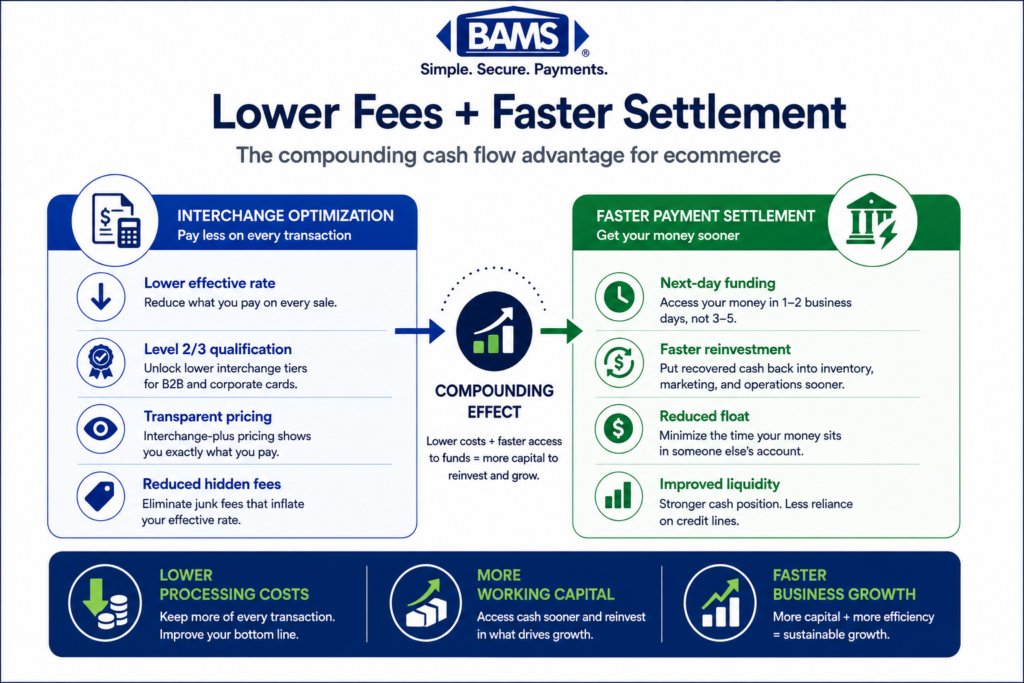
Level 2/3 Optimization: Audit Your B2B Interchange
Last Updated on August 13, 2026 by Dimitri Akhrin
A step-by-step process to verify your processor is actually qualifying transactions at the rates they claim
Learn how to pull transaction-level data, compare interchange qualification codes, and calculate the gap between what you’re paying and what you should be paying. Complete this hands-on audit in about two hours with just your statements and gateway logs.
TL;DR
- Your processor’s Level 3 claim needs proof – The only way to verify Level 2/3 optimization is checking the interchange category code on each transaction in your statement, not trusting vendor marketing.
- Timing is everything for qualification – Level 3 data (line items, tax, PO numbers) must be passed at the moment of authorization. Adding it after the fact does nothing for interchange savings.
- The cost gap is significant – Non-qualified commercial cards can cost 1.05 percentage points more than Level 3 qualified transactions, adding up to tens of thousands annually on B2B volume.
- Audit 30 to 50 B2B transactions quarterly – Match each to its interchange category, flag downgrades, calculate your dollar overpayment, and present the evidence to your processor with specific questions.
- Visa’s rules changed – Visa retired its Level 2 program, making full Level 3 data submission the only path to best rates on Visa commercial cards. Confirm your processor has updated their integration.
What You’ll Achieve: A Transaction-Level Audit of Your Level 2/3 Qualification
By the end of this tutorial, you will know exactly how to verify whether your processor is actually qualifying your B2B transactions at Level 2/3 interchange rates, or just claiming to. This is a hands-on audit process you can complete before your next billing cycle closes.
Your success criteria are concrete: you will pull transaction-level data from your processor, compare interchange qualification codes against what your statement reports, and calculate the gap between what you’re paying and what you should be paying. Enhanced Level 2 and Level 3 transaction data can help qualifying commercial card transactions access more favorable interchange categories when the required data is submitted correctly at authorization. If your processor says you’re getting those savings but your data says otherwise, you’ll have the evidence to act.
This tutorial is built for eCommerce managers at established businesses (10 to 50 employees) processing meaningful B2B card volume. No platform overhaul required. Just your statement, your gateway logs, and about two hours.
Prerequisites and Setup Checklist
Before you start, gather the following. Missing any one of these will stall the audit.
- Your last 3 monthly processing statements (PDF or portal access). You need line-item detail, not summary pages.
- Gateway or virtual terminal access with permission to view individual transaction records and authorization responses.
- A spreadsheet tool (Google Sheets, Excel, or similar) to log and compare transaction data.
- Your processor’s interchange schedule or rate table. If you don’t have one, request it in writing before starting.
- 30 to 50 recent B2B or commercial-card transactions identified by card type (purchasing cards, corporate cards, government cards).
Time estimate: 1.5 to 2.5 hours for the initial audit. Expect 15 to 30 minutes of back-and-forth with your processor if you need to request missing data.
Potential blocker: Some processors bundle interchange into flat or tiered pricing, which obscures qualification data. If your pricing model isn’t interchange-plus, you’ll need to request an interchange detail report separately. If your processor won’t provide one, that itself is a red flag worth noting.
Why This Audit Matters (and Why Vendors Won’t Do It for You)
Many processors advertise Level 2/3 optimization as a feature. Some even automate parts of it. But “our system automatically takes care of the rest” is a vendor claim, not a guarantee. The card networks have strict requirements for what data fields must be present, and critically, commercial card qualification depends on transaction data being transmitted as part of the authorization process. Data added after authorization generally cannot be used to improve interchange qualification for that transaction.
This means your invoice details, line-item data, and tax amounts are worthless for interchange qualification if they’re appended after the fact. The only way to know if qualification is happening is to check the actual interchange category each transaction settles at.
This audit is not about choosing a new vendor. It’s about holding your current vendor accountable with data. According to the Federal Reserve’s 2025 Small Business Credit Survey, managing operating expenses remains a significant challenge for many businesses, making payment cost optimization an important operational priority. The difference between a qualified and non-qualified commercial card transaction can be over a full percentage point, which adds up fast on high-ticket B2B orders.
Step-by-Step: How to Verify Level 2/3 Qualification on Your B2B Transactions
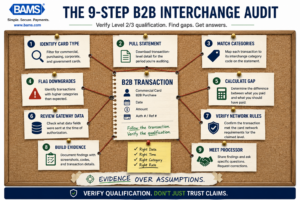
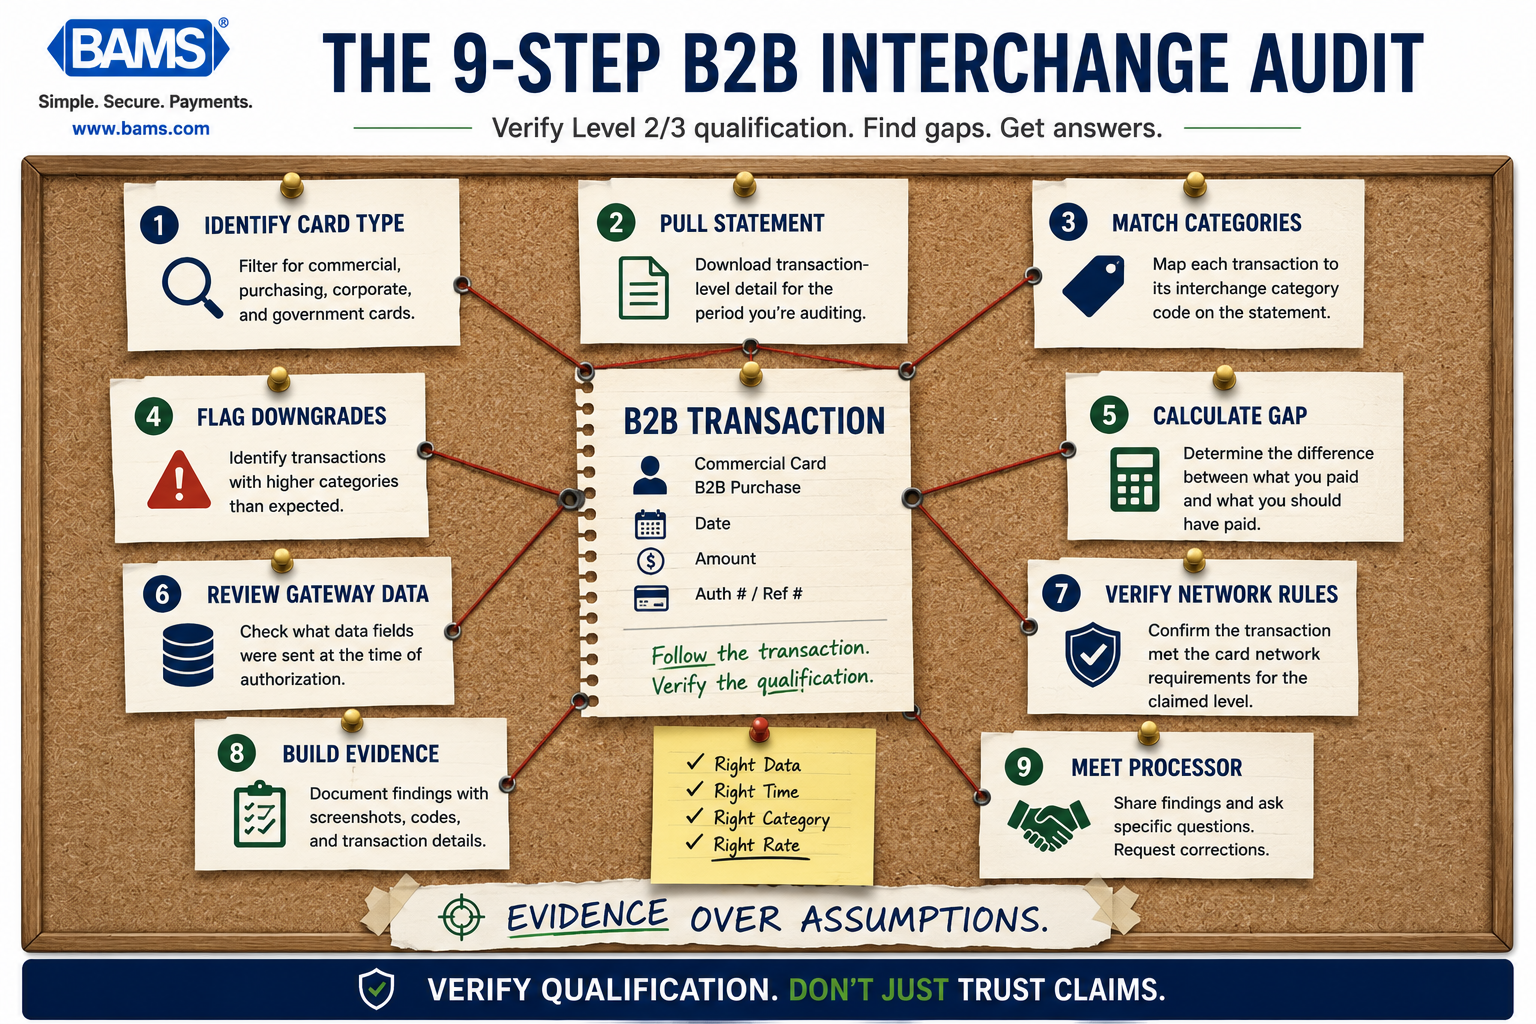
Professional infographic illustrating the complete workflow for auditing Level 2 and Level 3 interchange qualification on B2B transactions.
Step 1: Identify Your B2B and Commercial Card Transactions
Action: Log into your payment gateway or virtual terminal. Filter transactions from the most recent complete billing cycle. Look for card types labeled as “commercial,” “purchasing,” “corporate,” “business,” or “government.”
Most gateways display the card type or BIN category in the transaction detail view. Select 30 to 50 of these transactions and export them to your spreadsheet. Include the transaction ID, date, amount, card type, and any interchange category code shown.
Expected result: A spreadsheet with a clear list of B2B transactions isolated from consumer card volume.
Common failure: Your gateway doesn’t distinguish commercial cards from consumer cards. Fix: Request a “card type detail report” or “BIN report” from your processor. If they can’t provide one, flag this as a data transparency gap.
Step 2: Pull Your Interchange Detail Report
Action: Open your most recent processing statement. Look for a section labeled “Interchange Detail,” “Qualification Summary,” or “Rate Category Breakdown.” This section shows which interchange tier each transaction settled at.
If you’re on interchange-plus pricing, this data should be visible on your statement. If you’re on tiered or flat-rate pricing, you may need to request this report separately by contacting your processor’s support team.
Expected result: A list showing interchange categories like “Commercial Level III,” “Commercial Data Rate II,” “Commercial Standard” (non-qualified), or Visa-specific codes like “Commercial Enhanced Data.”
Common failure: Your statement only shows a blended rate with no interchange breakdown. Fix: Email your processor and request the interchange qualification detail for the billing period. Use the exact phrase: “Please provide the interchange category and qualification level for each transaction in [month] statement.” Put it in writing so you have a record.
Step 3: Match Transactions to Their Interchange Category
Action: In your spreadsheet, add a column labeled “Interchange Category.” For each of your 30 to 50 B2B transactions, find the corresponding interchange tier from your interchange detail report. Match by transaction ID, date, and amount.
Record the exact interchange category name and rate. You’re looking for whether each transaction settled at a Level 3 (or Level 2) rate versus a “Standard” or “Non-Qualified” commercial rate.
Expected result: Each row in your spreadsheet now shows the transaction amount alongside its actual interchange category. You can see at a glance which transactions qualified and which didn’t.
Common failure: Transaction IDs on your gateway don’t match the format on your statement. Fix: Match by date, amount, and last four digits of the card number instead. If multiple transactions share the same amount and date, narrow by timestamp if available.
Step 4: Flag Non-Qualified and Downgraded Transactions
Action: In your spreadsheet, add a column labeled “Qualification Status.” Mark each transaction as “Qualified (L3),” “Qualified (L2),” or “Non-Qualified / Downgraded.” Any commercial card transaction settling at “Standard” or “Data Rate I” rates is not getting Level 2/3 savings.
Count the totals. What percentage of your B2B transactions actually qualified at Level 3? If your processor claims full Level 2/3 optimization but fewer than 80% of eligible transactions are qualifying, something is broken.
Expected result: A clear qualification rate (e.g., “23 of 40 commercial card transactions qualified at Level 3”). This is your core audit metric.
Common failure: You see transactions labeled with unfamiliar interchange codes. Fix: Reference your processor’s interchange qualification documentation and card network guidance to understand how commercial card transactions are categorized and evaluated.
Step 5: Calculate Your Actual Cost Gap
Action: For each non-qualified transaction, calculate the difference between the rate it settled at and the rate it would have settled at with proper Level 3 qualification. Level 3 qualifying transactions may settle at more favorable interchange categories than non-qualified commercial card transactions, depending on card type, transaction characteristics, and network requirements.
Multiply the rate difference by the transaction amount. Sum the column. This is the money you left on the table in a single billing cycle.
Expected result: A dollar figure representing your monthly interchange overpayment on B2B volume. Annualize it by multiplying by 12. For merchants processing significant commercial card volume, qualification improvements can translate into meaningful annual savings.
Common failure: You’re unsure which Level 3 rate to use as the benchmark. Fix: Use the lowest published commercial interchange rate for your card network as the target. Your processor should be able to confirm the applicable Level 3 rate for your MCC (Merchant Category Code).
Step 6: Check What Data Fields Your Gateway Is Actually Sending

A transaction either qualifies or it doesn’t. Missing fields create downgrades.
Action: This step confirms why transactions are failing to qualify. Log into your gateway and open the detail view for one of your non-qualified B2B transactions. Look for the following fields in the authorization request:
- Level 2 fields: Tax amount, customer code (PO number), tax indicator
- Level 3 fields: Line-item detail (product codes, descriptions, quantities, unit costs), ship-to ZIP code, freight amount, duty amount, order-level discount
If any of these fields are blank or missing from the authorization request, the transaction cannot qualify at the corresponding level. Remember: this data must be present at authorization time, not added afterward.
Expected result: You can see exactly which required fields are populated and which are missing for non-qualifying transactions.
Common failure: Your gateway interface doesn’t expose raw authorization fields. Fix: Ask your processor for a “Level 3 data transmission report” or request API logs showing the fields sent with each authorization. If they can’t produce this, you have no way to verify their optimization claim.
Step 7: Cross-Reference Visa’s Current Requirements
Action: If a significant portion of your B2B volume runs on Visa commercial cards, note that Visa retired its Level 2 program in January 2026. The Visa Commercial Enhanced Data Program outlines Visa’s current approach to commercial card qualification and enhanced transaction data requirements. Visa now requires full Level 3 data under its Commercial Enhanced Data Program to receive the best interchange rates. There is no longer a “middle tier” for Visa.
Check your statement for any Visa commercial transactions still coded at a Level 2 rate. If your processor hasn’t updated their integration to reflect Visa’s current structure, your Visa commercial transactions may be settling at higher rates than necessary. Visa’s payment processing guidance emphasizes the importance of complete and accurate transaction information throughout the payment lifecycle.
Expected result: Confirmation that your processor’s Visa integration aligns with current card network requirements.
Common failure: Your processor still references “Visa Level 2” in their marketing or on your statement. Fix: Ask them directly: “Has your integration been updated for Visa’s Commercial Enhanced Data Program?” Document their response.
Step 8: Build Your Evidence Brief
Action: Compile your findings into a one-page summary. Include:
- Total B2B transactions audited
- Percentage that qualified at Level 3
- Percentage that settled at non-qualified rates
- Total monthly dollar overpayment
- Annualized cost gap
- Specific missing data fields identified
This brief is your leverage. You’ll use it in Step 9 whether you’re negotiating processing fees with your current provider or evaluating alternatives.
Expected result: A concise, data-backed document that replaces vague complaints with specific, verifiable claims.
Step 9: Present Findings to Your Processor
Action: Schedule a call or send a written request to your processor’s account manager. Share your evidence brief. Ask three specific questions:
- “Why did these [X] transactions not qualify at Level 3?”
- “What changes are needed in our integration to ensure Level 3 data is transmitted at authorization?”
- “Can you provide a timeline for resolving this before the next billing cycle?”
Do not accept vague answers like “we’ll look into it.” Request a written response with specific action items and dates.
Expected result: A clear commitment from your processor to fix data transmission gaps, or an honest admission that their system doesn’t support full Level 3 optimization for your setup.
Common failure: Your processor deflects blame to your eCommerce platform. Fix: This may be partially valid. Your platform must capture and pass line-item data to the gateway. But it’s your processor’s responsibility to ensure their gateway transmits it correctly at authorization. Both sides need to work. For merchants who want a provider that handles this transparently, BAMS offers dedicated account management that includes reviewing your interchange qualification as part of ongoing support, not just at onboarding.
Configuration and Customization: Key Variables to Adjust
Sample size: We recommended 30 to 50 transactions. If your B2B volume is high (500+ commercial card transactions per month), increase to 75 to 100 for statistical reliability. If your volume is under 50 transactions per month, audit all of them.
Card network mix: Visa, Mastercard, and American Express each have different Level 2/3 requirements and naming conventions. If your B2B volume is split across networks, audit each network separately. Visa’s recent program changes make it especially important to isolate Visa commercial transactions.
Audit frequency: Run this audit quarterly at minimum. Interchange categories can shift when your processor updates their software, when card networks change qualification rules, or when your eCommerce platform pushes updates that alter what data fields get passed. Set a calendar reminder.
Safe default: If you’re unsure whether a transaction “should” have qualified, err on the side of flagging it. It’s better to ask your processor about a correctly qualified transaction than to miss a downgrade.
Verification and Testing: Confirm Your Audit Is Accurate
Test procedure: Pick 5 transactions from your audit that you marked as “Qualified (L3)” and 5 you marked as “Non-Qualified.” Call your processor and ask them to confirm the interchange category for each. If their answers match your spreadsheet, your audit methodology is sound.
If there are discrepancies, ask the processor to explain the interchange category naming convention they use. Some processors relabel categories on statements, which can cause false positives or false negatives in your audit.
Edge cases to verify: Check transactions just under and just over common thresholds (e.g., $100, $1,000). Some interchange tiers have transaction-size thresholds. Also verify any transactions that were partially refunded, as refunds can alter the qualification status retroactively.
Common Errors and How to Fix Them
Error: “All my transactions show as qualified, but my effective rate is still high.”
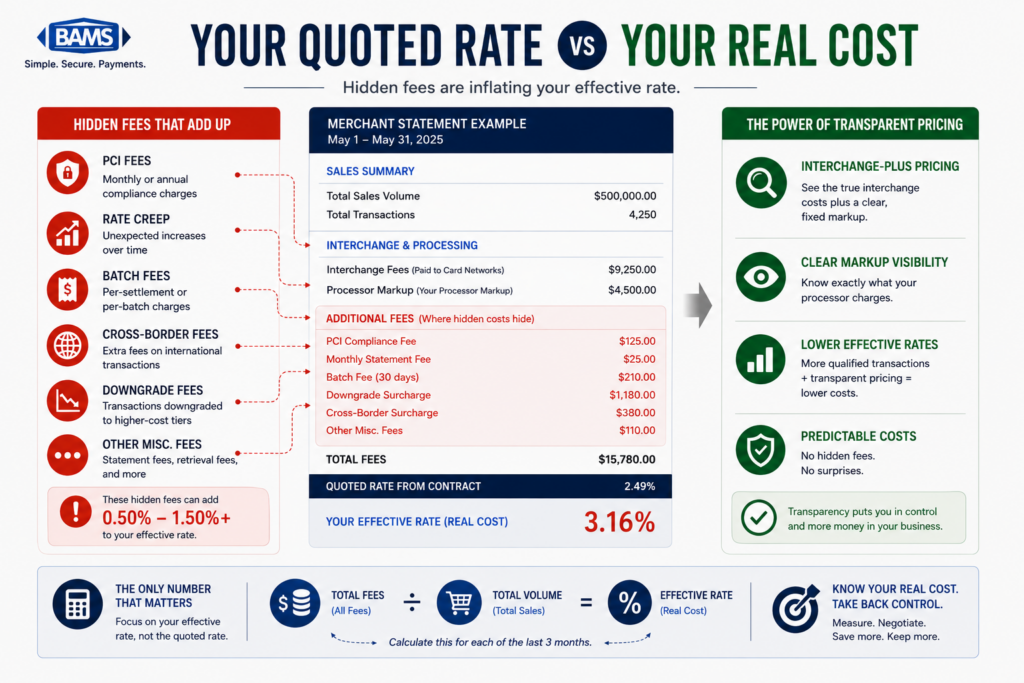
Cause: Your processor’s markup (the “plus” in interchange-plus) may be inflated, or you may have hidden fees in merchant services stacking on top of correctly qualified interchange. Qualification only controls the interchange component. Check your processor markup, assessment fees, and any add-on charges separately.
Error: “My processor says Level 3 data is being sent, but transactions still downgrade.”
Cause: One or more required fields may be populated with default or placeholder values (e.g., tax amount of $0.00 when tax applies, or a generic product code). Card networks validate field content, not just field presence. Review the actual values being transmitted, not just whether the fields exist.
Error: “I can’t find interchange detail on my statement.”
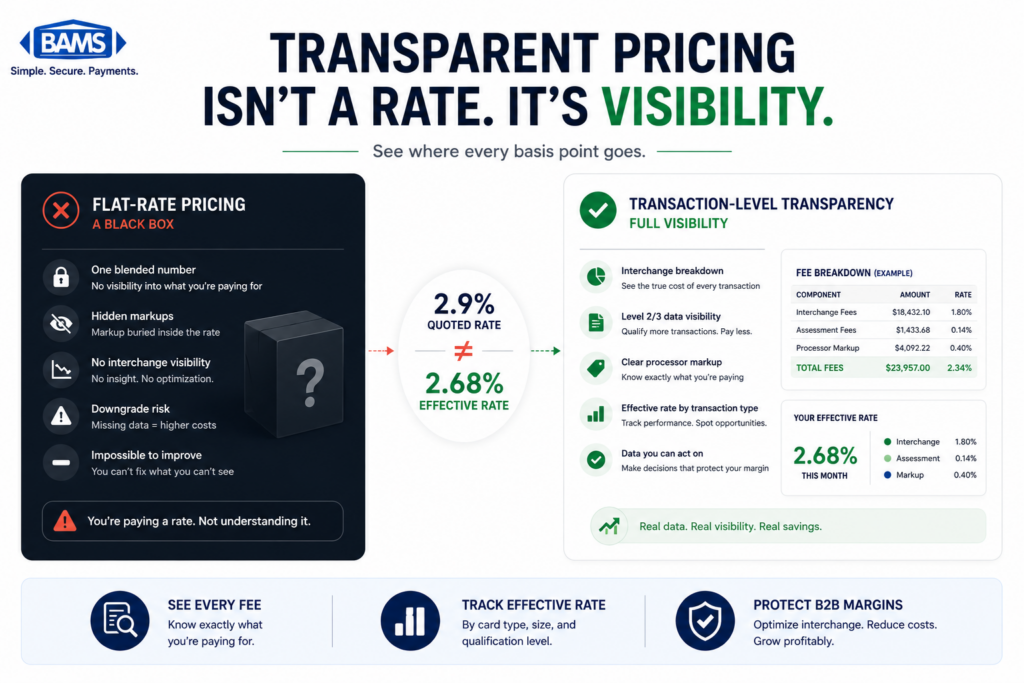
Cause: You may be on tiered or flat-rate pricing, which bundles interchange into opaque categories like “Qualified,” “Mid-Qualified,” and “Non-Qualified.” These labels are set by your processor, not by the card networks, and they obscure true interchange costs. Consider requesting a switch to interchange-plus pricing for full visibility.
Error: “My gateway doesn’t show Level 3 data fields.”
Cause: Not all gateways support Level 3 data transmission. Some older or budget gateways only support Level 1 (basic card and amount data). If your gateway can’t send Level 3 fields, no amount of invoice detail on your end will help. You need a gateway upgrade or a processor whose gateway handles Level 3 natively.
Error: “My qualification rate dropped after a platform update.”
Cause: eCommerce platform updates can change how data fields map to the gateway API. A plugin update or checkout flow change may have removed or renamed fields that your gateway relies on for Level 3 data. Check your platform’s payment integration settings and compare against your gateway’s required field mapping.
Next Steps: Extend Your Savings Beyond This Audit
Once you’ve verified (or exposed) your Level 3 qualification status, here are three ways to build on this work:
- Negotiate with data: Use your evidence brief to renegotiate your processor markup. Showing you’ve done the homework shifts the conversation from “can you lower my rate” to “here’s exactly where you’re overcharging me.”
- Automate monitoring: Ask your processor if they offer automated qualification reporting or alerts when transactions downgrade. If they don’t, schedule this audit quarterly and track your qualification rate over time.
- Audit adjacent fees: Interchange is the largest cost component, but it’s not the only one. Run a full line-by-line audit of your processing statement to catch assessment markups, PCI fee overcharges, batch fees, and other margin leaks that compound alongside interchange downgrades.
Frequently Asked Questions
What is interchange-plus pricing and how does it work?
Interchange-plus pricing separates your processing cost into two visible components: the interchange fee set by the card network (Visa, Mastercard) and a fixed markup charged by your processor. This transparency lets you see the actual interchange category each transaction settles at, which is essential for verifying Level 2/3 qualification. Without interchange-plus pricing, interchange costs are bundled into opaque tiers that make auditing nearly impossible.
Why should businesses consider Level 2/3 optimization for B2B transactions?
Commercial cards (purchasing, corporate, government) carry higher default interchange rates than consumer cards. By passing additional data fields like tax amounts, PO numbers, and line-item details at the time of authorization, you can qualify those transactions at lower interchange tiers. The savings range from 0.5% to 1.5% per transaction, which on meaningful B2B volume can translate to tens of thousands of dollars annually.
How can I tell if my processor is actually qualifying my transactions at Level 3?
The only reliable method is checking the interchange category code on each transaction in your statement’s interchange detail report. If your commercial card transactions are settling at “Standard” or “Data Rate I” categories instead of “Level III” or “Commercial Enhanced Data” categories, they are not qualifying regardless of what your processor claims. This tutorial walks through the exact steps to verify this.
What are the common hidden fees in merchant services that inflate B2B costs?
Beyond interchange downgrades, watch for PCI non-compliance fees, batch processing fees, statement fees, network assessment markups above the actual card network charge, and early termination penalties. These fees often appear as small line items but compound significantly over time. A line-by-line statement audit is the best way to catch them.
When is the best time to negotiate processing fees with my provider?
The best time is immediately after completing a data-backed audit like the one in this tutorial. Showing your processor specific evidence of non-qualifying transactions and the dollar amount you’re overpaying gives you concrete leverage. Avoid negotiating based on competitor quotes alone; processors respond more to proof of their own underperformance than to rate-shopping threats.
Does Level 2/3 optimization require changing my eCommerce platform?
Not necessarily. Most modern eCommerce platforms (Shopify Plus, BigCommerce, WooCommerce, Magento) can capture the required data fields. The key question is whether your payment gateway transmits those fields to the card network at authorization time. If your current gateway supports Level 3 data, you may only need to adjust field mappings or plugin settings rather than replacing your entire platform.