Transaction Data Optimization: A Field-Level Guide
How missing data fields silently push your transactions into higher interchange tiers — and how to fix it
Learn how tax, freight, and line-item data fields affect your interchange qualification tiers and why your gateway may not be passing them to card networks. This guide walks you through auditing and configuring your checkout to stop overpaying on every transaction.
TL;DR
- Your checkout collects data your gateway doesn’t transmit – Tax, freight, and line-item fields often exist in your eCommerce platform but never reach the card networks, causing every affected transaction to qualify at a more expensive interchange tier.
- Missing fields cost 20 to 90 basis points per transaction – The difference between Level 1 and Level 2/3 interchange qualification is significant. On $1 million in annual volume, that’s $2,000 to $9,000 in avoidable fees.
- Tax and freight are the highest-priority fields to map – These two fields are the most commonly missing and the most frequent cause of interchange downgrades. Always pass explicit $0.00 values for tax-exempt or free-shipping orders rather than leaving fields blank.
- Optimization is a configuration problem, not a negotiation problem – Interchange represents 70 to 80% of your total processing cost. Fixing field mappings in your gateway often delivers more savings than negotiating your processor’s markup.
- Monitor monthly or lose your gains – Platform updates and plugin changes can silently break field mappings. Track your effective processing rate and interchange qualification breakdown every month to catch regressions early.
Guide Orientation: What This Covers and Who It’s For
This guide is about transaction data optimization at the field level. Specifically, it walks you through how tax amounts, freight charges, and line-item details move (or fail to move) from your eCommerce checkout to the card networks, and why that gap inflates your payment processing fees.
It’s written for eCommerce managers at established online businesses who already process a meaningful volume of card transactions but suspect they’re overpaying without knowing exactly where the leak is. You don’t need a technical background, but you should have access to your gateway settings and processing statements.
By the end, you’ll understand how interchange qualification tiers work, which specific data fields determine your tier, and how to audit and configure your platform so those fields actually reach Visa and Mastercard. This guide does not cover PCI compliance, chargeback dispute workflows, or gateway selection. It focuses exclusively on the data-mapping problem between your checkout and the networks.
Why Transaction Data Optimization Matters to Your Bottom Line
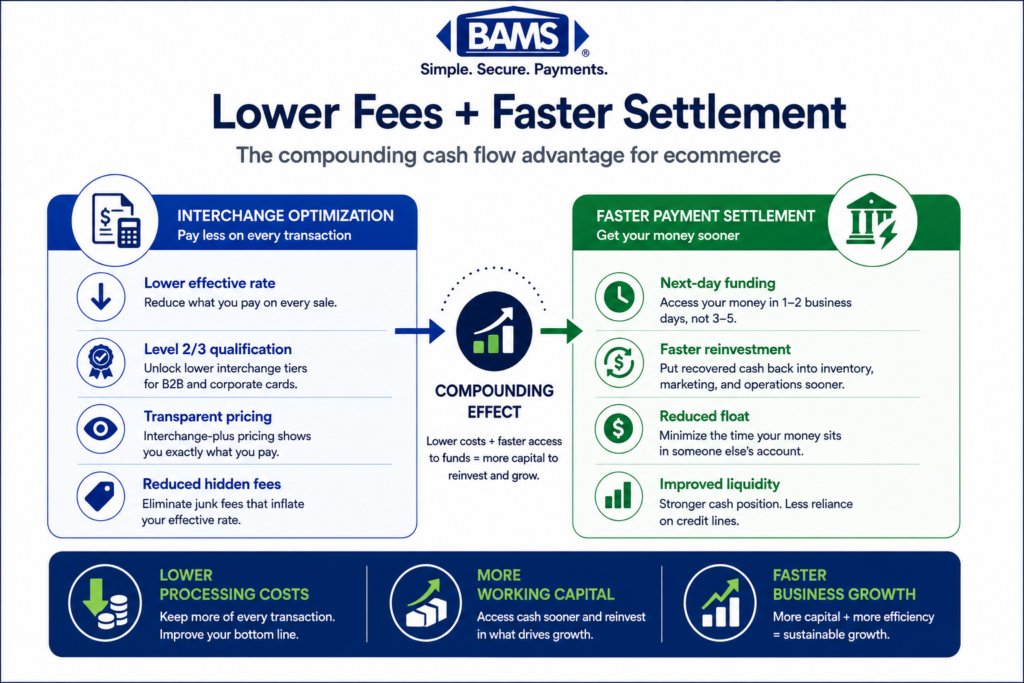
Payment acceptance costs can vary widely depending on card type, transaction data, pricing model, and interchange qualification. For a merchant processing $2 million annually, even a 0.3% difference in interchange qualification adds up to $6,000 per year in avoidable cost. Multiply that across thousands of SKUs and multiple card types, and the gap widens fast.
The problem isn’t that you’re being charged incorrectly. It’s that your transactions are qualifying at a higher interchange tier than necessary because the card networks aren’t receiving the data they need to grant you the lower rate. Visa and Mastercard set hundreds of interchange categories, and the difference between qualifying at Level 1 (basic) versus Level 3 (enhanced) can be 40 to 90 basis points per transaction. According to the Federal Reserve’s 2025 Small Business Credit Survey, managing operating expenses remains a significant challenge for many businesses, increasing the value of reducing avoidable payment acceptance costs.
Most eCommerce platforms collect tax and shipping data at checkout. But collecting data and transmitting data are two different operations. Default gateway plugins routinely strip enriched fields before submitting to the processor. Your checkout form might capture a freight amount, a tax total, and a line-item breakdown, yet none of that reaches the network. The result: every transaction downgrades to a more expensive tier, and your monthly statement reflects a higher effective processing rate than you should be paying.
Many merchants overpay because their transactions qualify at higher interchange categories due to missing or incomplete data fields. Transaction data optimization turns this from a fixed cost into a controllable variable.
Core Concepts: Interchange Tiers, Data Levels, and Field Mapping
Interchange Qualification Tiers
Every card transaction is assigned an interchange category by Visa or Mastercard based on several factors: card type (consumer, commercial, purchasing), merchant category code, and the richness of data submitted with the authorization and settlement. Richer data means a lower rate. The networks reward merchants who provide detailed transaction information because it reduces fraud risk and simplifies reconciliation for cardholders.
Level 1, Level 2, and Level 3 Data
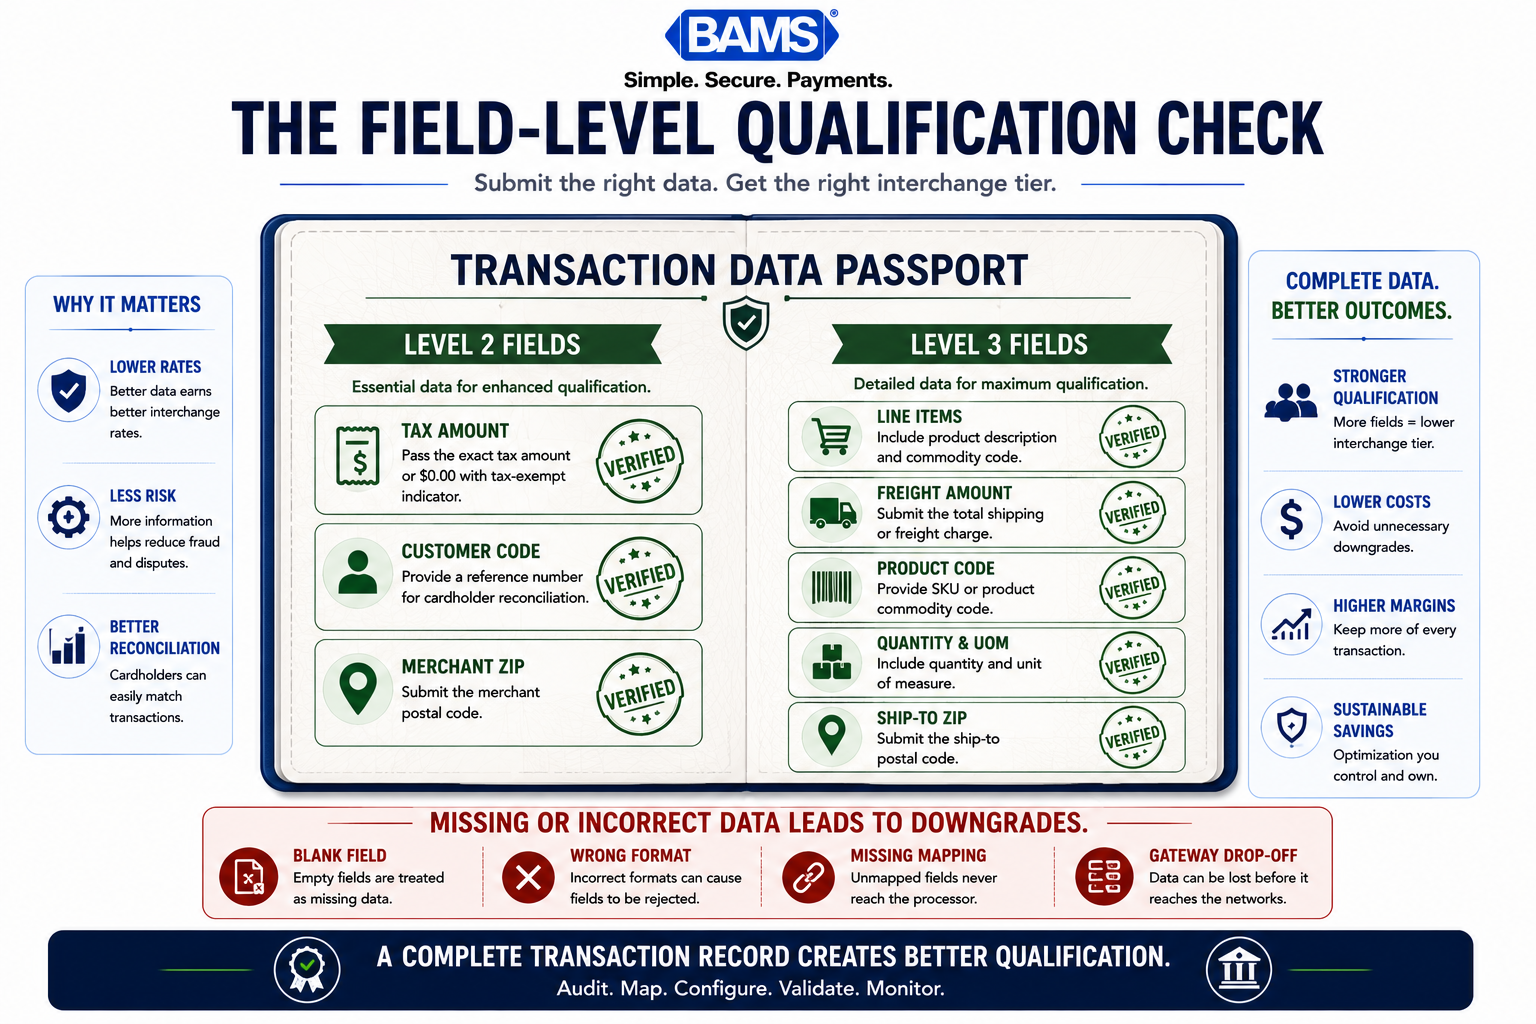
Level 1 is the baseline: merchant name, transaction amount, date. Every transaction includes this. Level 2 adds tax amount, customer code, and merchant postal code. Level 3 adds line-item detail: product descriptions, quantities, unit costs, commodity codes, freight amount, and ship-to postal codes. The Visa Commercial Enhanced Data Program highlights how enhanced transaction data supports commercial card qualification and improved interchange outcomes.
A common misconception is that Level 3 data only matters for B2B or government card transactions. While the savings are most dramatic on commercial and purchasing cards, even consumer card transactions benefit from Level 2 data. Submitting tax and customer reference fields can prevent downgrades on standard consumer transactions that would otherwise settle at a higher tier.
Field Mapping: The Actual Problem
Field mapping is the process of connecting a data point in your eCommerce platform (like the “shipping_total” field in WooCommerce or the “tax_lines” object in Shopify) to the corresponding field your payment gateway sends to the processor. Visa’s payment processing guidance emphasizes the importance of complete and accurate transaction information throughout the payment lifecycle.
If your platform stores freight as “shipping_cost” but your gateway expects “freight_amount,” and no mapping exists between them, that field arrives empty. The network sees a missing freight field and qualifies the transaction at a higher tier. This is the mechanical root of most interchange overpayment in eCommerce.
The Framework: Four Phases of Field-Level Optimization
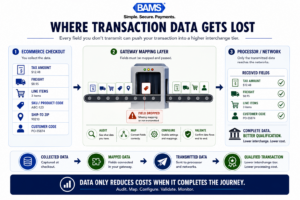
Your checkout may collect the data, but your gateway still has to transmit it.
Transaction data optimization follows a four-phase cycle. Each phase builds on the previous one, and skipping ahead creates blind spots that undermine the effort.
- Phase 1: Audit — Identify which data fields your platform collects, which your gateway transmits, and which the processor actually submits to the card network.
- Phase 2: Map — Create explicit field-to-field connections between your ecommerce platform, gateway, and processor for every required Level 2 and Level 3 field.
- Phase 3: Configure — Implement the mappings in your gateway settings, plugins, or API layer, and validate that enriched data flows end-to-end.
- Phase 4: Monitor — Track interchange qualification rates on your monthly statements to verify that transactions are landing in the expected tiers and catch regressions caused by platform updates or gateway changes.
These phases are cyclical. Platform updates, new product lines, and gateway version changes can break existing mappings. Monitoring feeds back into auditing, keeping your optimization durable.
Step-by-Step: Mapping Tax and Freight Fields Across Your Stack
Step 1: Audit Your Current Data Flow
Objective: Establish a clear picture of what data leaves your checkout, what your gateway transmits, and what the processor submits to the card network.
Start by pulling a sample of 20 to 30 recent transactions from your processing statement. Look for the qualification level assigned to each transaction. If your processor uses interchange-plus pricing (and if they don’t, that’s a separate problem worth addressing), your statement should show the specific interchange category each transaction qualified under. Terms like “EIRF” (Electronic Interchange Reimbursement Fee) or “Standard” on Visa transactions, or “Merit III” on Mastercard, indicate downgrades caused by missing data.
Next, open your eCommerce platform’s order detail view for those same transactions. Confirm that the order records contain tax amounts, shipping/freight totals, and line-item details (quantity, unit price, product code). In most cases, they will. Your platform is collecting the data. The question is whether it’s leaving your server.
Then check your gateway’s transaction logs. Most gateways (Authorize.Net, NMI, USAePay, Braintree) provide a transaction detail view that shows which fields were populated at submission time. Compare the gateway log against the order record. Missing fields in the gateway log are your optimization targets.
Anti-pattern: Don’t assume your gateway is passing everything because your checkout “looks complete.” The checkout form serves the customer. The gateway submission serves the network. They are independent data flows.
Success indicator: You have a documented list of fields that exist in your platform but are absent from gateway submissions. For a deeper diagnostic, this checklist of seven commonly missing L3 fields maps each gap to the specific downgrade it causes.
Step 2: Identify Required Fields by Card Network

Professional infographic showing the key Level 2 and Level 3 transaction fields merchants should audit to prevent interchange downgrades.
Objective: Know exactly which fields Visa and Mastercard require for Level 2 and Level 3 qualification so you can prioritize your mapping work.
Visa and Mastercard publish interchange qualification requirements, but the practical fields you need to focus on are consistent across both networks. For Level 2 qualification, you need: tax amount (or tax-exempt indicator), customer code (a reference number the cardholder can use for reconciliation), and merchant postal code. For Level 3 qualification, add: line-item commodity code, product description, quantity, unit of measure, unit cost, freight/shipping amount, duty amount (if applicable), and ship-to postal code.
Not every field carries equal weight. Tax amount and freight amount are the two fields most commonly missing from eCommerce transactions, and their absence is the single most frequent cause of downgrades. A transaction with a $0.00 tax field is different from a transaction with no tax field at all. The former tells the network the sale is tax-exempt. The latter tells the network you didn’t bother submitting tax data, and the transaction downgrades.
Anti-pattern: Don’t treat this as a checklist you complete once. Visa and Mastercard update interchange tables twice a year (April and October). Field requirements can shift, and new card products may introduce additional data expectations.
Success indicator: You have a prioritized list of fields to map, ranked by their impact on qualification. Tax and freight are almost always at the top.
Step 3: Build Platform-to-Gateway Field Maps
Objective: Create explicit, documented connections between your eCommerce platform’s data fields and your gateway’s expected input fields for every Level 2 and Level 3 requirement.
This is where the work gets platform-specific. Every eCommerce system stores transaction data differently. Shopify uses a structured API with objects like tax_lines and shipping_lines. WooCommerce stores tax as _order_tax and shipping as _order_shipping in its post meta table. Magento uses extension attributes. BigCommerce exposes tax and shipping through its Orders API.
Your gateway also has its own field schema. Authorize.Net’s Level 2/3 fields use names like taxAmount, freightAmount, and lineItems. NMI uses shipping and tax. The mapping exercise is literally: “Platform field X feeds into gateway field Y.”
For merchants using standard plugins (like WooCommerce’s built-in Authorize.Net integration), check whether the plugin supports Level 2/3 field passthrough. Many default plugins do not. They submit Level 1 data only. You may need a specialized plugin, a middleware layer, or a direct API integration to pass enriched data. Gateway integration choices directly determine which data reaches the networks, so this decision has real cost implications.
Anti-pattern: Don’t build mappings in your head or rely on verbal confirmation from your developer. Document every mapping in a spreadsheet or configuration file. When your plugin updates or your gateway changes its API, you need a reference to verify nothing broke.
Success indicator: A completed mapping document that shows every required L2/L3 field, the corresponding platform field name, the gateway field name, and the method of transmission (plugin setting, API parameter, middleware transformation).
Step 4: Configure and Test the Mappings
Objective: Implement your field maps in the live gateway configuration and validate that enriched data flows from checkout to the card network without data loss.
Implementation varies by setup. If your gateway plugin has Level 2/3 settings, enable them and populate the field mappings in the plugin’s configuration panel. And if you’re using a direct API integration, update your payment submission code to include the additional fields in the authorization and settlement requests. If your platform and gateway don’t natively support L3 passthrough, you’ll need middleware or a processor that offers an L3 optimization layer.
After configuration, run test transactions. Use a real card (not a test card number) for a small-dollar purchase and then check the gateway’s transaction detail to confirm the tax, freight, and line-item fields are populated. Some gateways provide a “Level 2/3 data submitted” flag in their reporting. If yours does, verify it shows as true.
Then wait for the transaction to settle (usually 24 to 48 hours) and check the interchange category it qualified under.
If you see it landing in a Level 2 or Level 3 tier instead of the standard or EIRF tier, your mapping is working. If it still downgrades, one or more required fields are still missing or malformed.
A merchant services partner like BAMS can help identify which fields are failing qualification by reviewing settlement data at the processor level, something most merchants can’t see in their gateway logs alone. Their account management team works with merchants to trace exactly where data drops out of the submission chain.
Anti-pattern: Don’t assume that enabling a “Level 3” checkbox in your plugin means all fields are mapped correctly. Many plugins enable the feature but leave individual field mappings empty or misconfigured by default.
Success indicator: Test transactions consistently qualify at Level 2 or Level 3 interchange tiers, confirmed by settlement-level reporting.
Step 5: Handle Edge Cases and Platform Variations
Objective: Account for transaction scenarios where standard mappings break down, so your optimization holds across your full order mix.
Standard field mappings work for straightforward orders: one shipment, one tax jurisdiction, all physical goods. But eCommerce is rarely that simple. Consider these common edge cases:
- Tax-exempt orders: If a customer is tax-exempt, your platform may leave the tax field blank rather than setting it to $0.00. A blank field triggers a downgrade. Configure your system to explicitly pass $0.00 with a tax-exempt indicator.
- Free shipping promotions: When you offer free shipping, the freight field may be omitted entirely. Pass $0.00 as the freight amount instead of leaving it empty.
- Digital goods: Products with no physical shipment still need a freight field (set to $0.00) and a ship-to postal code (use the billing postal code).
- Split shipments: If an order ships in multiple packages, the freight amount should reflect the total shipping cost for the order, not individual shipment costs, unless your gateway supports line-item-level freight allocation.
- Multi-currency transactions: Ensure tax and freight amounts are submitted in the transaction currency, not your base currency. Currency mismatches can cause field rejection at the network level.
Anti-pattern: Don’t optimize only for your most common order type and ignore the rest. Edge cases often represent 15 to 25% of transactions, and every downgraded transaction costs you basis points.
Success indicator: You’ve tested at least one transaction from each major order scenario (tax-exempt, free shipping, digital goods) and confirmed correct field population in the gateway log.
Step 6: Monitor Qualification Rates Monthly
Objective: Establish an ongoing monitoring practice that catches regressions before they accumulate into significant cost.
Your processing statement is the scoreboard. Each month, review the interchange qualification breakdown. If you’re on interchange-plus pricing, your statement should itemize transactions by interchange category. Calculate the percentage of transactions qualifying at Level 2 or Level 3 versus those downgrading to standard or EIRF tiers.
Set a baseline after your initial optimization. If 80% of your commercial card transactions now qualify at Level 3, that’s your benchmark. If next month it drops to 60%, something changed. Common causes include: a platform update that reset plugin settings, a new product category added without commodity codes, a gateway API version change that deprecated a field name, or a new shipping method that doesn’t populate the freight field.
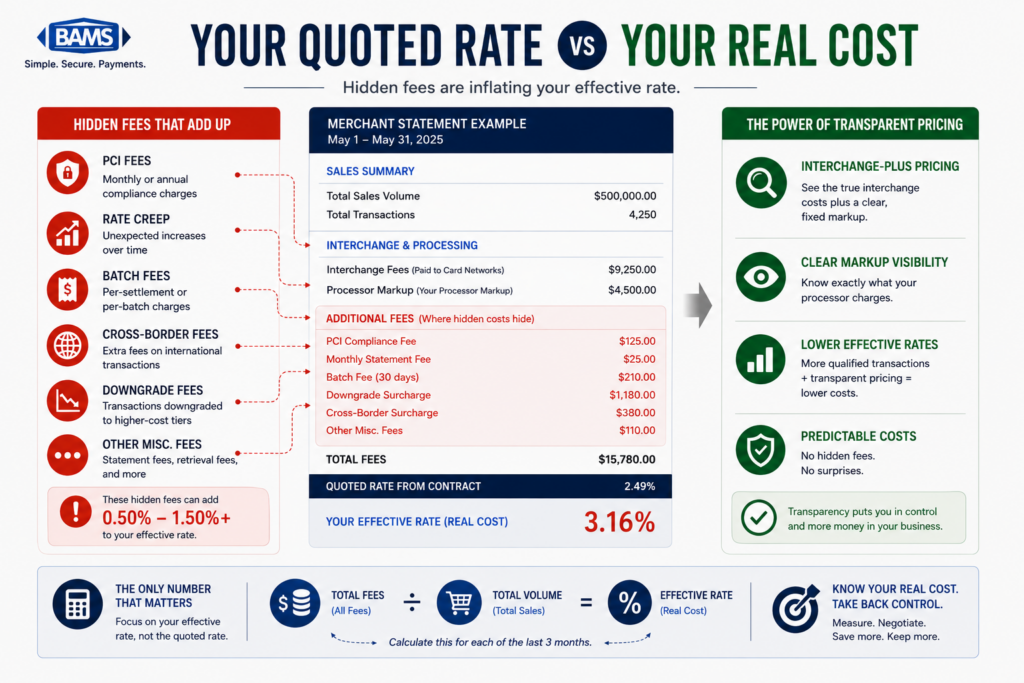
Track your effective processing rate (total processing fees divided by total processing volume) as a single summary metric. This number captures the net impact of all interchange qualifications, downgrades, and processor markups in one figure. A rising effective rate, even by 0.1%, signals a problem worth investigating. eCommerce profitability often hinges on these checkout-level configurations more than rate negotiations.
Anti-pattern: Don’t check your statement only when fees “feel high.” Downgrades accumulate silently. A monthly five-minute review prevents quarterly surprises.
Success indicator: You have a monthly tracking spreadsheet or dashboard showing qualification rates and effective processing rate, with alerts for deviations beyond your acceptable threshold.
Practical Examples: What This Looks Like in the Real World
Scenario A: WooCommerce Merchant Selling Industrial Supplies
A WooCommerce store processing $150,000/month in mostly commercial purchasing card transactions uses the default WooCommerce Payments plugin. The plugin submits Level 1 data only. Every transaction qualifies at the Visa Commercial Card Not T&Q (Tax & Qualification) tier, roughly 2.65% + $0.10.
After auditing, the merchant discovers that WooCommerce stores tax, shipping, and line-item data in its order meta, but the plugin never passes it. They switch to a gateway integration that supports L3 passthrough, map the _order_tax, _order_shipping, and line-item fields, and configure commodity codes for their product categories.
Result: Transactions now qualify at Visa Level III Commercial, roughly 1.90% + $0.10. On $150,000/month, that’s approximately $1,125 in monthly savings, or $13,500 annually, from configuration changes alone.
Scenario B: Shopify Merchant with Mixed Consumer and B2B Orders
A Shopify Plus merchant processes 70% consumer card transactions and 30% corporate card transactions. Their gateway passes Level 1 data for all transactions. Consumer transactions qualify at the standard eCommerce tier, which is close to optimal. But corporate card transactions downgrade because they lack tax amounts and customer codes.
The merchant configures their Shopify checkout to pass tax data through their gateway’s L2 fields and adds a “PO Number” field at checkout that maps to the customer code field. They don’t pursue full Level 3 because Shopify’s architecture makes line-item passthrough complex without middleware.
Result: Corporate card transactions move from Standard to Level 2 qualification, saving 20 to 30 basis points per transaction on 30% of their volume. The consumer transactions are unaffected. The total effective rate drops by roughly 0.08%, which on $3 million annual volume equals $2,400 in recovered margin.
Common Mistakes and Pitfalls
Treating all gateways as equal. Gateways differ dramatically in their Level 2/3 support. Some pass enriched data natively. Others strip it. Choosing a gateway based on checkout UX alone ignores its impact on interchange costs.
Confusing data collection with data transmission. Your checkout form collects data for the customer experience. Your gateway submission transmits data for the network. These are separate systems with separate configurations. One working doesn’t guarantee the other works.
Setting and forgetting. Platform updates, plugin patches, and gateway API changes can silently break field mappings. Optimization without monitoring is temporary.
Ignoring zero-value fields. A $0.00 tax field and a missing tax field produce completely different outcomes at the network level. Always pass explicit zero values for tax-exempt or free-shipping orders.
Over-focusing on rate negotiation. Negotiating your processor’s markup matters, but interchange is typically 70 to 80% of your total processing cost. Optimizing the interchange qualification tier often delivers more savings than negotiating the markup by a few basis points.
What to Do Next
Start with the audit. Pull 20 transactions from your most recent statement, identify their interchange categories, and compare those categories against the data your platform stores for the same orders. That comparison will tell you, in concrete terms, whether you have a field-mapping gap and how large it is.
If the gap is significant, prioritize tax and freight fields first. They’re the highest-impact, lowest-effort mappings and they affect every transaction regardless of card type. Line-item detail (Level 3) is the next layer, most impactful for merchants with significant commercial or purchasing card volume.
Revisit this guide as your platform evolves. New payment methods, gateway updates, and product line changes can all introduce new mapping gaps. Treat this as an ongoing operational practice, not a one-time project. Your processing costs are not fixed. They respond directly to the data you control.
Frequently Asked Questions
How does optimizing transaction data affect processing fees?
Card networks like Visa and Mastercard set lower interchange rates for transactions that include enriched data (tax amounts, freight charges, line-item details). When your gateway submits this data, transactions qualify at Level 2 or Level 3 tiers instead of the default Level 1 tier. The difference can range from 20 to 90 basis points per transaction, which translates to meaningful savings at scale.
What are the best strategies to reduce payment processing fees?
The most effective strategies are ensuring your transactions qualify at the lowest possible interchange tier through proper data submission, using interchange-plus pricing so you can see exactly what you’re paying, and auditing your statements monthly for downgrades. Rate negotiation with your processor helps, but interchange optimization typically delivers larger savings because interchange represents 70 to 80% of total processing cost.
Why is interchange-plus pricing more beneficial than flat-rate pricing?
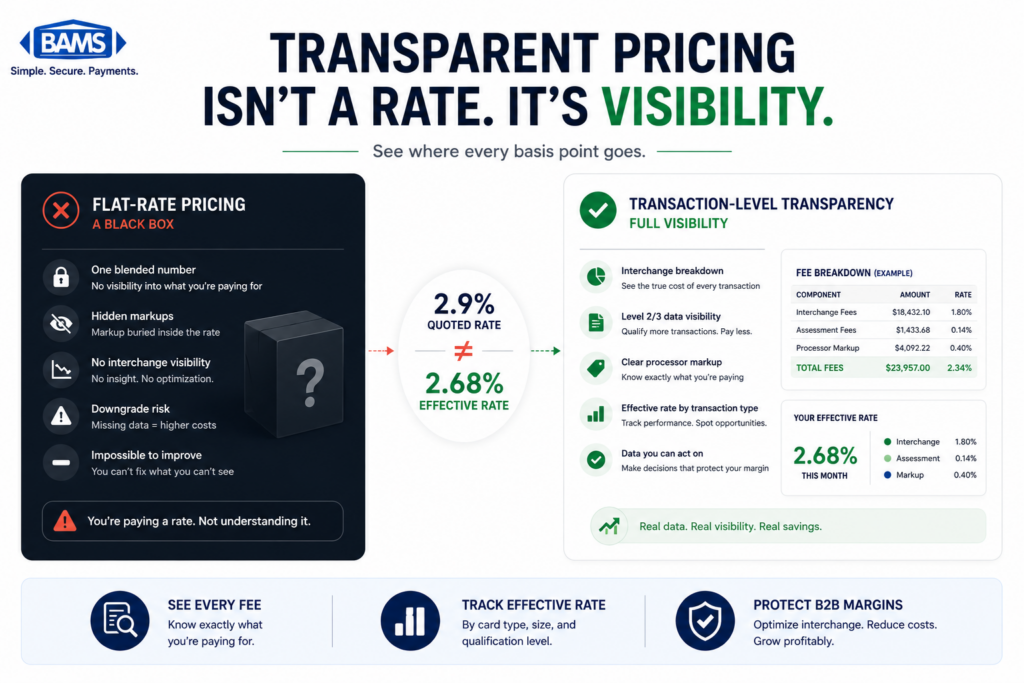
Interchange-plus pricing separates the card network’s base rate from your processor’s markup, giving you visibility into both components. This transparency lets you identify downgraded transactions, measure the impact of data optimization, and verify that your processor’s markup is competitive. Flat-rate pricing bundles everything together, hiding interchange inefficiencies and making it impossible to know whether your transactions are qualifying correctly.
Do Level 2 and Level 3 data fields only matter for B2B transactions?
Level 3 data produces the most dramatic savings on commercial, purchasing, and government cards. However, Level 2 data (especially tax amount and customer code) can prevent downgrades on consumer card transactions too. Any transaction missing required fields risks qualifying at a higher tier, regardless of card type. Submitting enriched data is a best practice for all transactions.
How can I tell if my gateway is stripping data before it reaches the processor?
Check your gateway’s transaction detail logs for a sample of recent orders. Compare the fields shown in the gateway log against the data stored in your eCommerce platform’s order records. If your platform shows tax, shipping, and line-item data but the gateway log shows only basic transaction details, your gateway or its plugin is not passing enriched fields. Many default plugins submit Level 1 data only, even when your platform collects much more.
How often should I audit my interchange qualification rates?
Monthly is the recommended frequency. Platform updates, plugin patches, and gateway API changes can break field mappings without warning. A five-minute monthly review of your interchange qualification breakdown and effective processing rate catches regressions before they accumulate into significant cost. Set a baseline after your initial optimization and flag any month where qualification rates drop by more than a few percentage points.