Payment Gateway Integration: Unlock Level 3 Rates
Last Updated on July 30, 2026 by Dimitri Akhrin
Map the exact tax, freight, and line-item fields that qualify every B2B transaction for lower interchange
Learn which Level 2 and Level 3 data fields your payment gateway must pass to qualify commercial card transactions for reduced interchange rates. This step-by-step tutorial covers platform-specific configuration, test validation, and the prerequisites that block L3 savings.
TL;DR
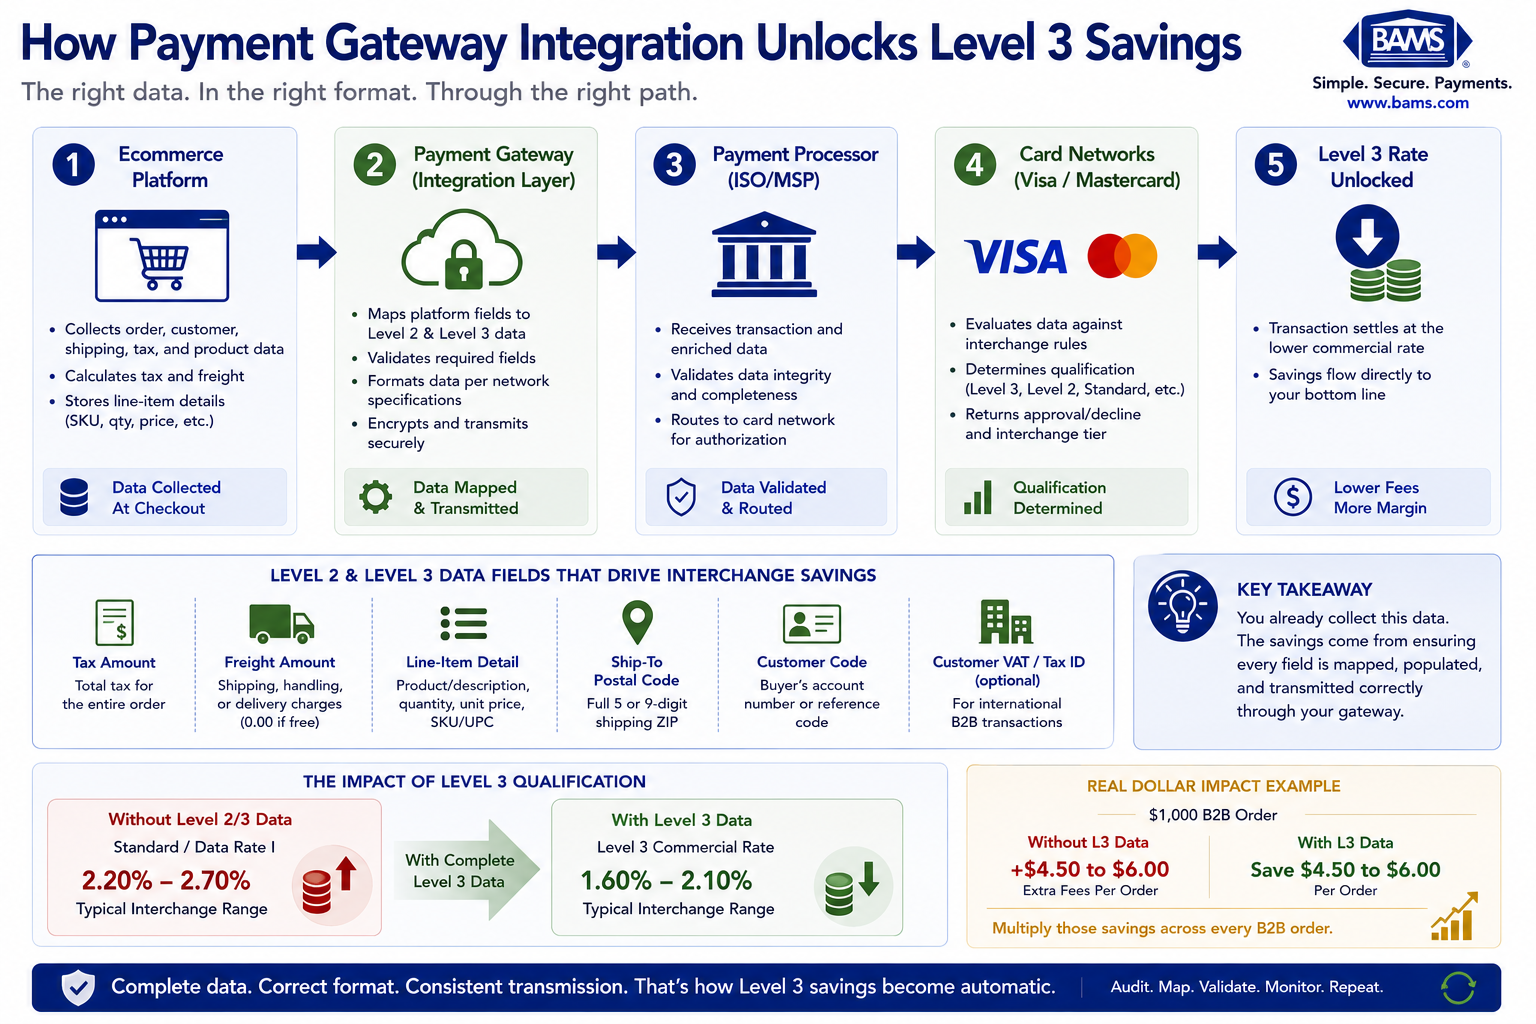
- Missing data fields cost you real money – Processing commercial cards without Level 3 data adds 0.45% to 0.60% per transaction, which on a $1,000 order means $4.50 to $6.00 in avoidable fees.
- L3 is a configuration task, not a product upgrade – Your gateway likely supports Level 3 data already. The fix is mapping tax, freight, and line-item fields from your eCommerce platform to your gateway’s API payload.
- Every field matters, including zeros – Free shipping must pass as “0.00” in the freight field. Tax-exempt orders need explicit zero values. Null or blank fields trigger automatic downgrades.
- Visa and Mastercard have different requirements – Field names and required attributes vary between networks. Cross-check your mapping against both specifications to avoid qualifying for one but not the other.
- Automate and monitor monthly – Manual L3 entry doesn’t scale. Automate data population through your plugin or middleware, then review your interchange detail report each month to catch new downgrades early.
What You’ll Achieve: Lower Interchange on Every B2B Order
By the end of this tutorial, you will have mapped the exact tax, freight, and line-item data fields your payment gateway integration needs to pass so that commercial card transactions qualify for Level 2 and Level 3 interchange rates. The result is a measurable drop in your effective processing rate on B2B orders.
Your success criteria are simple. After completing these steps, run a test transaction with a corporate or purchasing card. Then check your processing statement or gateway report. If the transaction settles at the L3 commercial rate instead of the standard “Data Rate I” or “Standard” tier, you’ve succeeded. You’ll see the difference in basis points within your next statement cycle.
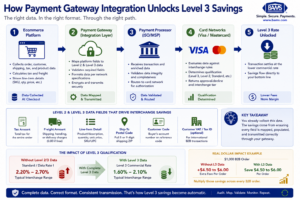
The key to Level 3 qualification isn’t collecting more data—it’s ensuring your payment gateway passes every required field to the processor in the correct format.
Prerequisites and Setup Checklist
Before you start, confirm the following items are in place. Missing even one can block L3 qualification entirely.
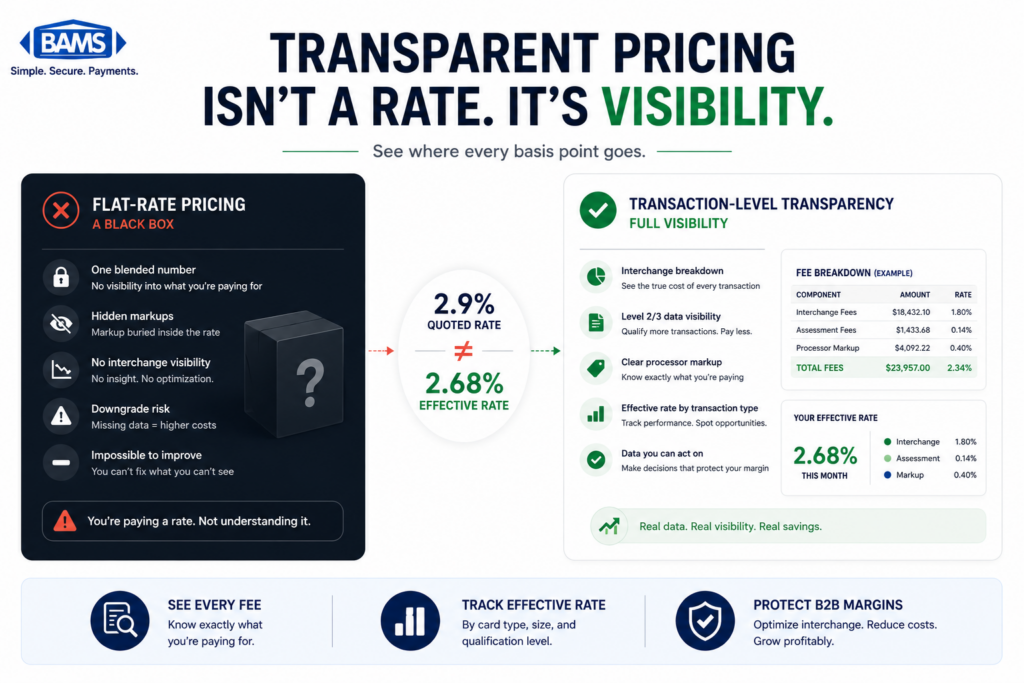
- Interchange-plus pricing on your merchant account (flat-rate pricing absorbs L3 savings, so you won’t see a benefit). If you’re unsure which model you’re on, review these factors for choosing a payment processor.
- A gateway that supports Level 3 data fields (examples: NMI, Authorize.Net CIM, CardPointe, PayTrace, or a proprietary gateway with L3 endpoints).
- Admin access to your eCommerce platform (Shopify Plus, WooCommerce, Magento, BigCommerce, or custom).
- A test corporate/purchasing card (Visa or Mastercard commercial card) to validate qualification.
- Your current processing statement so you can benchmark your effective rate before and after.
Time estimate: 2 to 4 hours for initial configuration. Add 1 hour for testing. Potential blockers include gateway plugins that strip enriched data fields before submission.
Why Field Mapping Matters More Than Rate Negotiation
Most eCommerce managers focus on negotiating lower markups with their processor. That helps, but it ignores the largest variable in your processing cost: the interchange rate set by Visa and Mastercard. Interchange is determined by the data you send with each transaction, not by your negotiating skill.
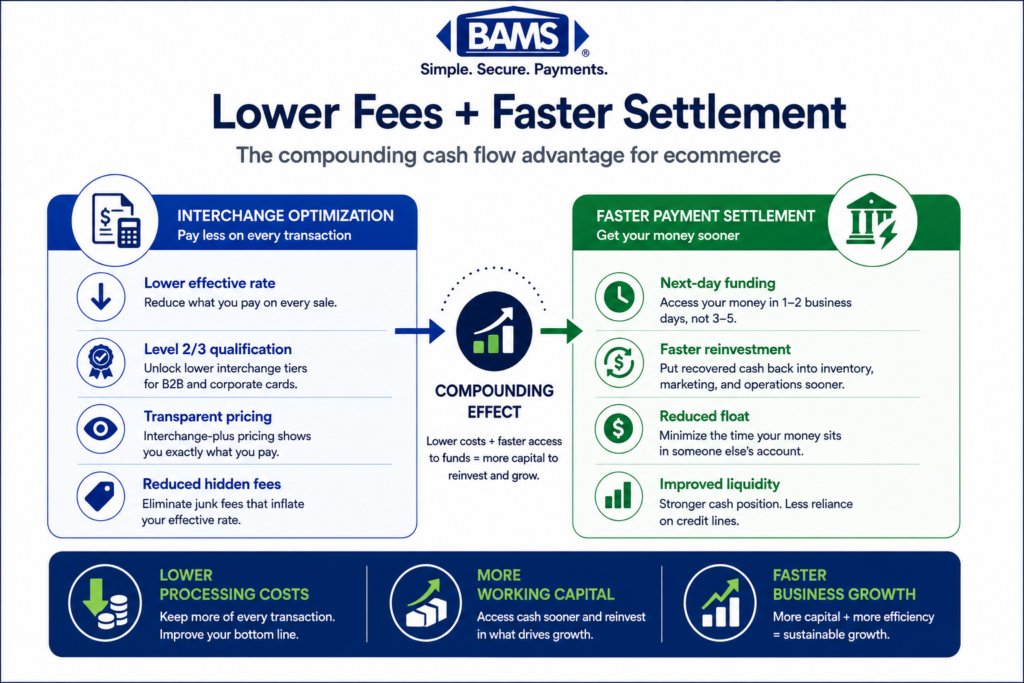
Processing a commercial card without L2 or L3 data can increase costs by 0.45% to 0.60% per transaction. On a $1,000 order, that’s $4.50 to $6.00 in unnecessary fees. Multiply that across hundreds of monthly B2B orders and the cost adds up fast. According to the Federal Reserve’s 2025 Small Business Credit Survey, controlling operating expenses remains a priority for many businesses. Optimizing payment acceptance costs is one way merchants can improve margins without increasing sales.
This tutorial treats L3 optimization as a platform configuration task. You don’t need a new merchant account or a different gateway. You need to ensure your existing stack passes the right fields in the right format.
Step 1: Audit Your Current Data Submission
Action: Log into your payment gateway’s reporting dashboard. Pull up a recent transaction made with a commercial or purchasing card. Look for the “Level” or “Qualification” column.
If you see “Data Rate I,” “Standard,” or “EIRF” (Electronic Interchange Reimbursement Fee), your transactions are downgrading. That means your gateway is not passing enough data to qualify for the lower rate. If you see “Data Rate III” or “Commercial Level 3,” you’re already qualifying and can skip ahead to Step 10 for fine-tuning.
Common failure: Your gateway dashboard may not show qualification levels. In that case, request an interchange detail report from your processor. Every interchange-plus statement should itemize the qualification tier per transaction.
Step 2: Identify the Required Level 2 Fields
Action: Before you can reach Level 3, you must first satisfy Level 2 requirements. These are the baseline fields that every commercial card transaction needs.
- Tax amount (the total sales tax charged on the order)
- Tax indicator (a flag: taxable, tax-exempt, or not provided)
- Customer code / PO number (the buyer’s purchase order reference)
- Merchant postal code (your business zip code)
Checkpoint: If your checkout flow doesn’t collect a PO number from B2B buyers, add a custom field now. Many platforms support this through checkout customization or a simple plugin. Without a customer code, L2 qualification fails on most Visa commercial cards.
Step 3: Identify the Required Level 3 Fields
Action: Level 3 adds line-item detail to the transaction. This is where the real savings appear. Each line item in the order must include the following fields. Refer to this breakdown of the 7 missing L3 fields that inflate your effective processing rate for a detailed diagnostic.
- Item commodity code (a standardized product classification code)
- Item description (plain-text product name)
- Item quantity
- Unit of measure (e.g., “EA” for each, “CS” for case)
- Unit price (price per unit before tax)
- Extended amount (quantity × unit price)
- Line-item tax amount
- Line-item tax rate
- Discount amount (per line, if applicable; pass 0 if none)
Additionally, the transaction-level fields below are required:
- Ship-to postal code
- Ship-from postal code
- Freight/shipping amount
- Duty amount (pass 0 for domestic orders)
- Order date
Common failure: Omitting the freight amount or passing it as null instead of 0 when shipping is free. Card networks treat a missing freight field as incomplete data, triggering a downgrade.
Step 4: Map Fields in Your eCommerce Platform
Action: Open your eCommerce platform’s order data structure and map each required field to the corresponding value in your product catalog and checkout flow.
WooCommerce Example
If you use WooCommerce with a gateway plugin like NMI or CardPointe, you’ll typically configure field mapping in the plugin settings. Navigate to WooCommerce → Settings → Payments → [Your Gateway] → Level 3 Data. Enable L3 processing and verify that the plugin pulls tax, shipping, and line-item data from the WooCommerce order object.
Tax Amount → order.get_total_tax()
Freight Amount → order.get_shipping_total()
Line Item Qty → item.get_quantity()
Unit Price → item.get_subtotal() / item.get_quantity()
Item Description → item.get_name()
Magento / Adobe Commerce Example
Magento’s payment gateway modules often expose L3 fields through the Stores → Configuration → Sales → Payment Methods → [Gateway] → Level III panel. Enable the feature, then confirm that your tax calculation module is active. Magento natively calculates line-item tax, but you must verify the gateway extension reads from the correct tax attribute.
Shopify Plus Example
Shopify’s standard checkout passes limited data to most gateways. On Shopify Plus, you can use checkout extensibility or a middleware integration to inject L3 fields into the gateway API call. This typically requires a custom app or a payment orchestration layer that sits between Shopify and your gateway.
Checkpoint: After mapping, place a test order. In your gateway’s transaction detail view, confirm that tax, freight, and at least one line item with all required sub-fields appear in the submitted data.
Step 5: Configure the Gateway API Payload
Action: If your platform plugin handles L3 natively, verify the API payload. If you use a custom integration, you’ll need to build the L3 object into your authorization or capture request.
Below is a simplified example of an L3 payload structure for a gateway API call. Replace placeholder values with your actual order data.
{
“level3”: {
“ship_to_zip”: “90210”,
“ship_from_zip”: “10001”,
“freight_amount”: “12.50”,
“duty_amount”: “0.00”,
“tax_amount”: “8.75”,
“tax_indicator”: “1”,
“customer_code”: “PO-44821”,
“order_date”: “2024-11-15”,
“line_items”: [
{
“commodity_code”: “4901.99”,
“description”: “Industrial Widget A”,
“quantity”: “10”,
“unit_of_measure”: “EA”,
“unit_price”: “25.00”,
“extended_amount”: “250.00”,
“tax_amount”: “21.88”,
“tax_rate”: “8.75”,
“discount_amount”: “0.00”
Key detail: The commodity_code field uses harmonized tariff codes or UNSPSC codes. If you don’t have commodity codes for your products, use a general code for your product category. Your gateway’s documentation will specify which classification system it accepts.
Common failure: Sending the L3 data only on the authorization call but not on the capture. Some gateways require L3 data at capture time for it to reach the card network. Check your gateway integration documentation to confirm when L3 data must be submitted.
Step 6: Handle Tax-Exempt and Zero-Freight Scenarios
Action: B2B orders frequently involve tax-exempt buyers or free shipping. Both scenarios require explicit field values, not empty or null fields.
- Tax-exempt orders: Set
tax_indicatorto “0” (tax-exempt) andtax_amountto “0.00”. Do not leave tax fields blank. - Free shipping orders: Set
freight_amountto “0.00”. A missing freight field triggers a downgrade even when shipping is complimentary. - Digital goods with no shipping: Still pass
ship_to_zipusing the billing postal code, and set freight to “0.00”.
Checkpoint: Place a test order with a tax-exempt customer profile and free shipping. Verify in the gateway log that all fields are populated with explicit zero values.
Step 7: Validate Field Formatting Per Card Network
Action: Visa and Mastercard have slightly different L3 requirements. Your gateway should handle formatting, but verify these common differences.
- Visa: Requires
customer_code(up to 17 characters). Tax fields are mandatory. Line-item detail is required for Level 3. - Mastercard: Uses the term “Reference Number” instead of “Customer Code.” Mastercard also requires a
freight_amountat the transaction level. Line-item commodity codes are recommended but handled more flexibly.
Consult your gateway’s Visa and Mastercard integration guides for exact field lengths and data types. Truncated or malformatted fields silently fail qualification.
Step 8: Automate L3 Data Population
Action: Manual entry of L3 fields is not sustainable for eCommerce. Set up automation so that every qualifying order populates L3 data without human intervention.
Most eCommerce platforms already store the data you need (product names, quantities, prices, tax amounts, shipping costs). The gap is usually in the gateway plugin’s ability to read and transmit that data. Automating L2 and L3 data transmission in real time allows B2B merchants to benefit from lower interchange rates consistently.
If your current plugin doesn’t support automated L3 population, consider these options:
- Upgrade your gateway plugin to a version that supports L3 (check the plugin’s changelog or feature list).
- Use middleware (a payment orchestration layer or API wrapper) that intercepts the transaction and appends L3 data before it reaches the gateway.
- Build a custom integration using your gateway’s API documentation. This is most common on headless commerce or custom-built storefronts.
For merchants processing a high volume of B2B orders, a merchant services partner like BAMS can help identify whether your current gateway and plugin stack supports automated L3 data capture, and flag configuration gaps that cause silent downgrades.
Step 9: Run a Live Test Transaction
Action: Place a real order using a Visa or Mastercard commercial/purchasing card. Use an order that includes at least two line items, a non-zero tax amount, and a shipping charge.
- Complete checkout as a B2B buyer would, including a PO number in the customer code field.
- After the transaction settles (typically 24 to 48 hours), log into your gateway dashboard.
- Locate the transaction and check the qualification level. Look for “Level III,” “Data Rate III,” or “Commercial T&E Level 3.”
Expected result: The transaction should appear at the L3 interchange tier. For a $1,000 Visa commercial transaction, this could mean a fee of approximately $18.60 instead of $29.60, saving $11.00 on that single order.
Common failure: The transaction qualifies at Level 2 but not Level 3. This usually means line-item data is missing or malformatted. Revisit Step 5 and check that every line item includes all nine required sub-fields.
Configuration and Customization
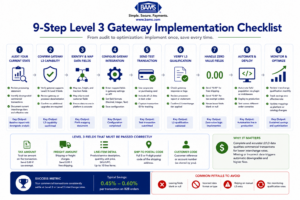
A structured implementation roadmap helps merchants configure Level 3 payment gateway integrations correctly, validate qualification, and maintain long-term interchange savings.
Variables You Should Adjust
- Commodity codes: Use the most specific code available for your products. Generic codes work but may not optimize qualification for all card types.
- Unit of measure: Match the unit your platform uses. Common values are “EA” (each), “BX” (box), “CS” (case), “LB” (pound). Your gateway documentation lists accepted values.
- Customer code source: Decide whether to pull this from a PO number field, a custom checkout field, or the order ID. PO numbers are preferred because they match the buyer’s internal records.
Safe Defaults vs. Must-Change Settings
- Safe default:
duty_amount= “0.00” for all domestic orders. - Safe default:
discount_amount= “0.00” per line item when no discount applies. - Must change:
ship_from_zipmust reflect your actual warehouse or fulfillment center zip code, not a placeholder. - Must change:
tax_indicatormust accurately reflect whether tax was charged. Misrepresenting tax status violates card network rules.
Verification and Testing
After your initial test transaction succeeds, verify these edge cases over the following week:
- Multi-item orders (3+ line items) to confirm all items pass L3 data.
- Tax-exempt orders to verify zero-value tax fields don’t cause rejection.
- Orders with discounts to confirm the discount amount field populates correctly.
- Refunds and partial refunds to confirm L3 data persists on credit transactions.
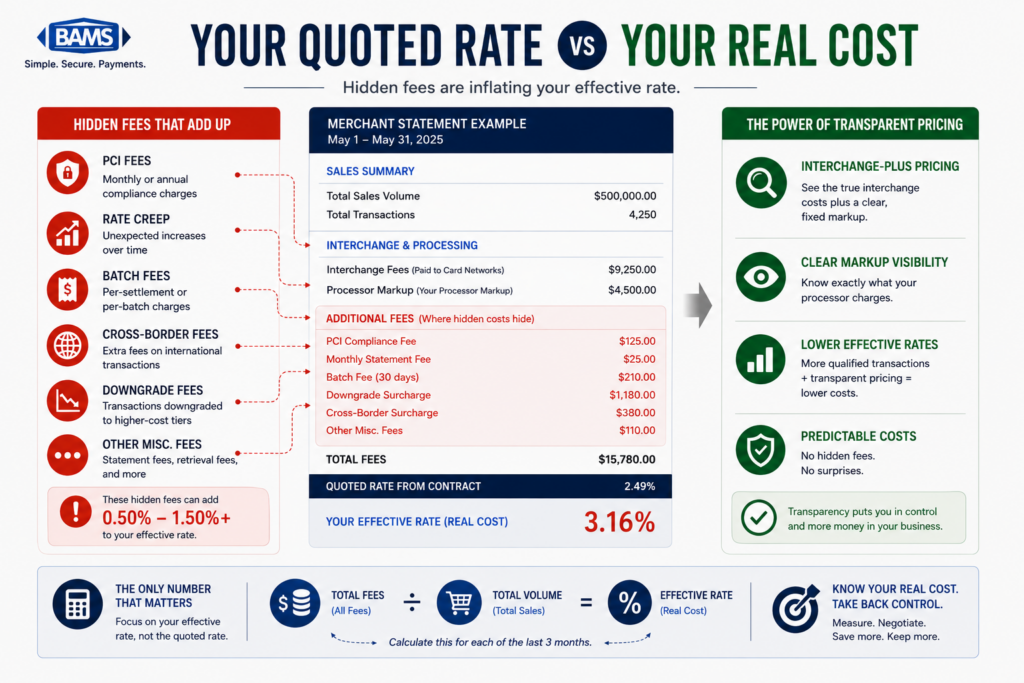
Success means every commercial card transaction on your next processing statement shows L3 qualification. Compare your effective processing rate (total fees ÷ total volume) from the month before configuration to the month after. You should see a measurable decrease.
Common Errors and Fixes When You Optimize Transaction Routing
Error: “Invalid tax amount” or transaction downgrades despite tax field being set
Cause: The tax amount at the transaction level doesn’t match the sum of line-item tax amounts. Card networks validate this math.
Fix: Ensure your platform calculates line-item taxes that sum exactly to the order-level tax total. Rounding discrepancies of even $0.01 can trigger a mismatch.
Error: L3 data accepted by gateway but transaction still qualifies at Level 2
Cause: The gateway accepted the data but one or more required fields were empty, null, or in an unsupported format.
Fix: Request the raw API response from your gateway. Look for field-level warnings or rejections. Common culprits are missing commodity_code or unit_of_measure.
Error: Qualification works for Visa but not Mastercard (or vice versa)
Cause: Each network has different required and optional fields. Your mapping may satisfy one but not the other.
Fix: Review Step 7 and cross-check your field mapping against both networks’ specifications. Pay special attention to customer_code vs. “Reference Number” naming.
Error: Plugin upgrade broke L3 data submission
Cause: Gateway plugin updates sometimes reset L3 configuration settings or change field mapping.
Fix: After any plugin update, revisit your L3 settings panel and re-run a test transaction. Keep a documented record of your field mappings so you can restore them quickly.
Error: Free shipping orders still downgrading
Cause: The freight amount field is empty or null instead of explicitly set to “0.00”.
Fix: Add conditional logic in your integration: if shipping cost equals zero, pass “0.00” as the freight amount. Never leave the field blank.
Next Steps and Extensions
Now that your L3 field mapping is live, consider these follow-on actions to further reduce processing costs:
- Route high-ticket B2B orders to ACH: For orders above a certain threshold, offering ACH at checkout can eliminate card interchange entirely. This ACH vs. card cost-elimination framework walks through the setup.
- Monitor qualification rates monthly: Set a calendar reminder to check your interchange detail report. Catch new downgrades early, especially after platform updates or product catalog changes.
- Expand to surcharging or dual pricing: In states where permitted, passing processing costs to commercial card users can offset remaining interchange. Consult your processor for compliance guidance.
Every B2B transaction that qualifies at Level 3 instead of Standard saves you real dollars. The configuration work you’ve done here compounds with every order, turning your payment gateway from a cost center into a competitive advantage.
Frequently Asked Questions
How does optimizing transaction data affect processing fees?
When your gateway sends enriched data (tax amounts, freight charges, line-item details) with each transaction, card networks like Visa and Mastercard recognize the transaction as lower risk and assign it a reduced interchange rate. Without this data, the same transaction settles at a higher “standard” or “downgrade” tier, costing you 0.45% to 0.60% more per transaction.
What are the best strategies to reduce payment processing fees?
The most effective strategies include switching to interchange-plus pricing so you see actual interchange costs, mapping Level 2 and Level 3 data fields in your gateway to qualify for lower commercial card rates, routing high-value B2B orders through ACH instead of card networks, and regularly auditing your processing statements for downgrades. Negotiating your processor’s markup helps, but fixing data-driven downgrades typically yields larger savings.
Why is interchange-plus pricing more beneficial than flat-rate pricing?
Flat-rate pricing charges you the same percentage regardless of card type or data quality. With interchange-plus, you pay the actual interchange rate set by the card network plus a fixed markup. This means when you qualify transactions at Level 3, your costs drop immediately. On flat-rate pricing, the processor keeps the savings instead of passing them to you.
Do I need a new payment gateway to submit Level 3 data?
Not necessarily. Many popular gateways (NMI, PayTrace, CardPointe, Authorize.Net CIM) already support Level 3 fields. The issue is usually that the feature isn’t enabled or your eCommerce plugin doesn’t map the required fields. Check your gateway’s documentation or settings panel for an L3 option before switching providers.
Which card types benefit from Level 3 data optimization?
Level 3 data primarily benefits Visa commercial, corporate, and purchasing cards, as well as Mastercard commercial and fleet cards. Standard consumer credit and debit cards do not have separate L3 interchange tiers. If a significant portion of your orders come from business buyers using corporate cards, L3 optimization delivers the highest return.
How can I tell if my transactions are being downgraded?
Request an interchange detail report from your processor. Look for qualification labels like “EIRF,” “Standard,” or “Data Rate I” next to commercial card transactions. These labels indicate the transaction did not meet L2 or L3 data requirements. Transactions qualifying correctly will show “Data Rate III,” “Commercial Level 3,” or similar labels.