Payment Processing Strategies: A Pre-Season Setup Guide
Last Updated on July 29, 2026 by Dimitri Akhrin
Configure your payment stack before volume spikes to prevent chargebacks, processor holds, and cash flow disruptions
Learn how to audit and configure your payment processing stack before peak season hits. This step-by-step tutorial covers authentication flows, transaction retry strategy, and the specific gateway settings that keep chargeback ratios below network thresholds.
TL;DR
- Chargebacks after peak season are preventable – They result from skipped pre-season configuration steps (unclear descriptors, missing authentication rules, slow refund workflows), not bad luck.
- Notify your processor before volume climbs – Unapproved volume spikes trigger risk holds and reserves that freeze your cash flow at the worst possible time. Submit volume increase requests 6 weeks early.
- Configure authentication and retries by risk level – Apply 3DS2 selectively to high-risk transactions, build decline-code-based retry logic for soft declines, and never retry hard declines.
- Test your full payment flow end-to-end – Run sandbox tests for successful purchases, 3DS challenges, soft and hard declines, and refunds before a single peak-season transaction processes.
- Set monitoring alerts below card network thresholds – Alert at 0.65% chargeback ratio (not 1.0%) and when authorization rates drop 3+ points, so you catch problems before they become account-threatening.
What You’ll Achieve: A Pre-Season Payment Stack That Cuts Costs and Chargebacks
By following this tutorial, you will configure your payment processing strategies to handle seasonal volume spikes without triggering processor holds, excessive chargebacks, or delayed deposits. You’ll walk away with a fully audited payment stack, optimized authentication flows, a tested transaction retry strategy, and clear verification steps to confirm everything works before your next peak season hits.
Your success criteria are straightforward: authorization rates stay stable (or improve) as volume climbs, chargeback ratios remain below card network thresholds, and your cash flow isn’t strangled by reserve requirements or delayed funding during the weeks you need capital most.

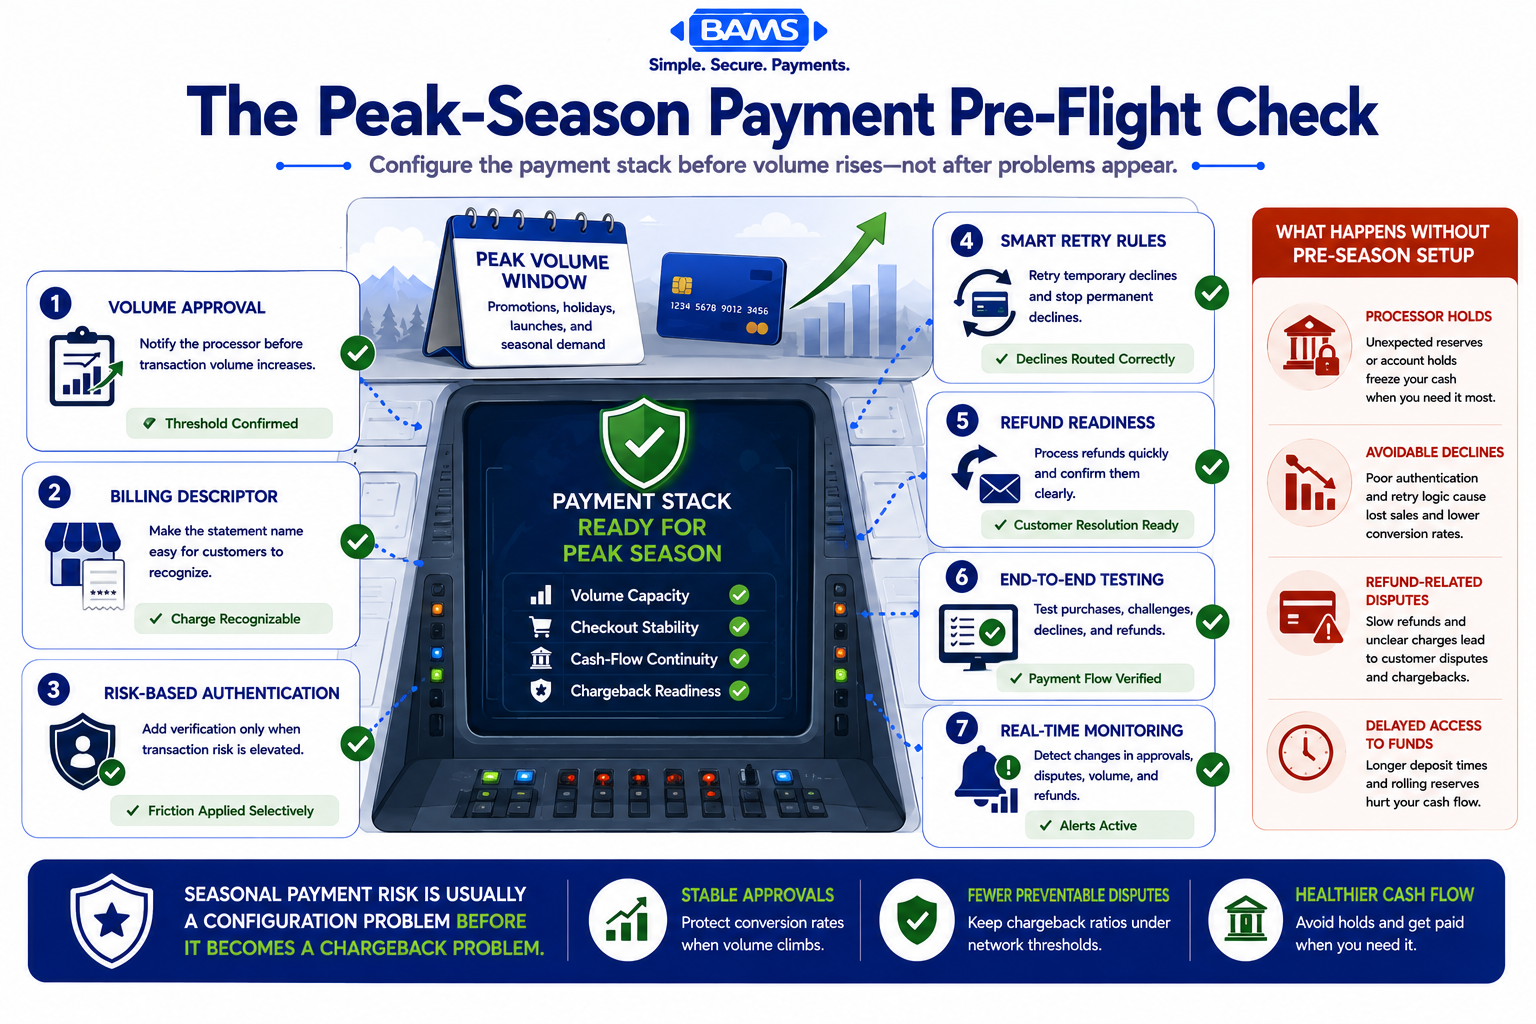
Peak-season payment problems are easier to prevent than repair. A structured pre-flight check helps merchants protect authorization rates, cash flow, and chargeback performance before transaction volume rises.
Prerequisites and Setup Checklist
Before you start, gather the following. Missing any of these will slow you down or block a step entirely.
- Admin access to your payment gateway dashboard (Stripe, Authorize.net, Braintree, or equivalent)
- Login credentials for your processor’s merchant portal where you manage risk settings and volume thresholds
- 12 months of transaction data exported as CSV, including authorization rates, decline codes, chargeback counts, and average ticket size
- Your current chargeback ratio (total chargebacks divided by total transactions for the most recent month)
- Descriptor settings documentation showing exactly what appears on customer bank statements
- Contact information for your processor’s account manager or support team
Time estimate: 4 to 6 hours spread across 2 to 3 sessions. The biggest potential blocker is waiting on your processor to approve volume threshold increases, which can take 3 to 5 business days. Start at least 6 weeks before your peak season.
Why System-Level Configuration Beats Reactive Dispute Management
Most eCommerce managers treat chargebacks as a customer service problem. They respond to disputes after the fact, absorb fees, and accept higher processing costs as the price of doing business during busy months. This approach is expensive and avoidable.
The alternative is treating chargeback prevention as a configuration task. You adjust your payment authentication flow, retry logic, descriptor clarity, and volume thresholds before transactions start climbing. Visa explains that layered transaction monitoring uses risk scoring, predictive models, and post-transaction monitoring to help businesses identify suspicious activity and payment risks.
This tutorial follows that principle. Every step is a setting you change, a threshold you adjust, or a test you run before peak season, not after.
Step 1: Audit Your Transaction Data to Identify Seasonal Risk Patterns
Open your 12-month transaction export and filter for your previous peak season window (typically the 8 to 12 weeks surrounding your highest-volume period). You’re looking for four specific patterns.
- Authorization decline rate: Did it increase by more than 3 percentage points compared to your off-season average?
- Chargeback timing: Did chargebacks spike 30 to 60 days after peak season ended? (This is the most common and most overlooked pattern.)
- Decline code concentration: Sort declines by reason code. “Do Not Honor” and “Insufficient Funds” codes above 15% of total declines signal retry optimization opportunities.
- Average ticket size shift: A sudden jump in average order value during peak season can trigger fraud filters you didn’t know were active.
Checkpoint: You should now have four numbers written down: peak decline rate, post-peak chargeback count, top 3 decline codes with percentages, and peak vs. off-peak average ticket size difference. These numbers drive every decision in the remaining steps.
Common failure: If your gateway doesn’t export decline codes, contact support and request a detailed decline report. Most gateways can generate this on request even if it’s not in the self-service dashboard.
Step 2: Notify Your Processor of Expected Volume Increases
This is the step most eCommerce managers skip, and it’s the one that causes the most damage. Processors monitor transaction velocity. When your volume suddenly doubles or triples without warning, their risk systems flag your account. The consequences range from delayed deposits to rolling reserves to outright holds on your funds.
Action: Contact your processor’s account management team (or submit a volume increase request through their portal) with the following information:
- Expected peak daily transaction count
- Expected peak daily dollar volume
- Start and end dates of your anticipated high-volume window
- Any planned promotions, flash sales, or product launches with dates
Expected result: Your processor acknowledges the request and confirms your account can handle the stated volume without triggering automatic risk holds. Get this confirmation in writing (email is fine).
Common failure: Some processors take 5+ business days to process volume threshold changes. If you’re less than two weeks from peak season, escalate immediately and ask for expedited review. This is also a good time to evaluate whether your processor’s deposit timing works for your cash flow needs during high-volume periods.
Step 3: Clean Up Your Billing Descriptors
Unclear billing descriptors are a leading cause of “friendly fraud” chargebacks. Customers see an unfamiliar charge on their statement, don’t recognize it, and file a dispute. This problem multiplies during peak season because customers are making more purchases from more merchants and have shorter memory of each transaction.
Action: Log into your payment gateway and navigate to your billing descriptor settings. Verify the following:
- Your business name matches what customers see on your website and in confirmation emails
- Your phone number or URL is included in the descriptor (most gateways allow a “soft descriptor” field for this)
- If you operate multiple storefronts, each one has a unique, recognizable descriptor
Checkpoint: Make a test purchase on your own site. Check the pending charge on your bank or credit card statement. If you can’t immediately identify the charge as coming from your store, your customers can’t either. Fix it before proceeding.
Step 4: Configure Your Payment Authentication Flow for Seasonal Traffic
Your payment authentication flow determines how much friction customers experience at checkout and how much fraud protection you get. The goal is to apply strong authentication where risk is high and reduce friction where risk is low, not to apply the same rules to every transaction regardless of context.
Action: In your gateway’s fraud and authentication settings, configure the following rules:
- Enable 3D Secure 2.0 (3DS2) selectively: Apply it to transactions above your average ticket size threshold, first-time customers, and orders shipping to addresses that don’t match the billing address. Do not apply it to returning customers with successful purchase history.
- Set velocity filters: Flag (but don’t auto-decline) more than 3 transactions from the same card or IP address within 15 minutes. During peak season, legitimate customers sometimes retry after a page timeout.
- Enable Address Verification Service (AVS): Require at minimum a ZIP code match. Decline only on full AVS mismatches (no match on street or ZIP).
Expected result: Your authentication rules are tiered by risk level. Low-risk returning customers check out with minimal friction. High-risk signals (new customer, high ticket, address mismatch) trigger additional verification.
Common failure: Setting 3DS2 to “challenge all transactions” can hurt conversion. Use your gateway’s risk scoring to trigger challenges selectively. EMVCo explains that EMV 3-D Secure allows issuers to evaluate transaction, payment method, and device data so customers can be authenticated without adding unnecessary checkout friction.
Step 5: Build a Smart Transaction Retry Strategy
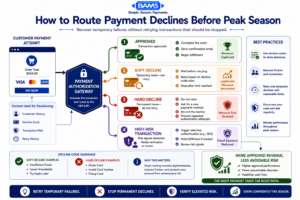
Not every declined payment should be treated the same. Separating temporary declines from permanent and high-risk failures helps merchants recover legitimate revenue without creating additional fraud exposure.
Not every declined transaction is a lost sale. Many declines are “soft” (temporary) rather than “hard” (permanent). A well-configured transaction retry strategy recovers revenue without annoying customers or triggering processor flags.
Action: Configure retry logic based on decline code categories:
SOFT DECLINE CODES (retry eligible):
– “Insufficient Funds” → Retry once after 24 hours
– “Issuer Unavailable” → Retry once after 4 hours
– “Try Again Later” → Retry once after 1 hour
HARD DECLINE CODES (do not retry):
– “Stolen Card” → Do not retry. Flag for review.
– “Invalid Card Number” → Do not retry. Prompt customer to update.
– “Pickup Card” → Do not retry. Flag for review.
RETRY LIMITS:
– Maximum 3 retry attempts per transaction
– Minimum 1 hour between retries
– Stop retries after 72 hours from initial attempt
Checkpoint: Verify your retry rules are saved and active in your gateway. Run a test transaction with a test card that returns a soft decline code and confirm the retry fires at the correct interval.
Common failure: Retrying hard declines wastes authorization attempts and can get your merchant account flagged by card networks. If your gateway doesn’t support decline-code-based retry logic natively, check whether your payment orchestration layer or subscription billing tool offers this feature.
Step 6: Review and Tighten Your Refund and Cancellation Workflow
A fast, visible refund process is your best chargeback deflection tool. Customers who can easily get a refund don’t file disputes. During peak season, refund request volume increases proportionally with sales, and slow responses push customers toward their bank instead of your support team.
Action: Verify and adjust the following:
- Refund processing time: Aim for refunds initiated within 24 hours of approval. If your current workflow takes longer, identify the bottleneck (manual approval queue, batch processing schedule) and fix it.
- Confirmation emails: Every refund should trigger an automatic email with the refund amount, expected timeline for the credit to appear (typically 5 to 10 business days), and the original transaction reference number.
- Self-service cancellation: If you sell subscriptions or recurring products, make sure customers can cancel without contacting support. Friction here directly converts to chargebacks.
Expected result: Your refund turnaround time is under 24 hours, every refund generates a confirmation email, and subscription customers can cancel through your site without a support ticket.
Step 7: Stress-Test Your Payment Stack Before Volume Climbs
You’ve made configuration changes across your gateway, authentication rules, retry logic, and refund workflow. Now test the full payment authentication flow end-to-end under simulated load.
Action: Run the following tests using your gateway’s sandbox or test mode:
- Successful purchase: Complete a full checkout. Verify the billing descriptor, confirmation email, and deposit timing.
- 3DS2 challenge: Use a test card that triggers a 3DS challenge. Verify the challenge appears only when your risk rules dictate.
- Soft decline + retry: Use a test card that returns “Insufficient Funds.” Verify the retry fires at your configured interval.
- Hard decline: Use a test card that returns “Stolen Card.” Verify no retry is attempted and the transaction is flagged.
- Refund: Process a refund on a test transaction. Verify the confirmation email sends with correct details.
Checkpoint: All five tests pass. If any test fails, revisit the relevant step and re-check your configuration before moving on.
Step 8: Set Up Real-Time Monitoring and Alert Thresholds
Configuration is only as good as your ability to catch problems early. Set up alerts that notify you when key metrics drift outside acceptable ranges during peak season.
Action: In your gateway or analytics dashboard, configure alerts for:
- Authorization rate drops below 90% (or 3+ points below your baseline)
- Chargeback ratio exceeds 0.65% of total transactions (card network thresholds are typically 0.9% to 1.0%, so you want early warning)
- Daily transaction volume exceeds 150% of the threshold you communicated to your processor
- Refund rate exceeds 5% of daily transactions
Expected result: You receive email or SMS alerts within minutes of any threshold breach, giving you time to investigate and adjust before the problem compounds.
For merchants who want proactive chargeback defense built into their processing relationship, BAMS offers dedicated account management that monitors these metrics on your behalf and intervenes before thresholds are breached, which is especially valuable during seasonal surges when your team is focused on fulfillment.
Configuration and Customization Notes
Settings You Should Adjust for Your Business
The thresholds in this tutorial are safe defaults for most eCommerce businesses processing $50K to $500K per month. Here’s where you should customize:
- 3DS2 ticket size trigger: Set this to 1.5x your average order value. If your AOV is $60, trigger 3DS challenges at $90+.
- Retry intervals: If you sell digital goods with instant delivery, shorten retry windows (retry “Issuer Unavailable” after 1 hour instead of 4). For physical goods, the default intervals work well.
- Velocity filter thresholds: If you sell consumables that customers legitimately reorder frequently, raise the velocity filter from 3 to 5 transactions per 15 minutes.
Settings You Must Not Change
- Hard decline retry rules: Never retry hard declines. This is a card network rule, not a suggestion.
- Maximum retry attempts: Do not exceed 4 retries per transaction within a 7-day window. Exceeding this can result in network fines.
- Chargeback alert threshold: Keep this below 0.75% regardless of your business model. Crossing 1.0% puts your merchant account at risk of termination.
Verification and Testing
Your pre-season payment stack is ready when all of the following are true:
- Your processor has confirmed your volume increase request in writing
- A test purchase shows a clear, recognizable billing descriptor on your bank statement
- 3DS2 challenges fire selectively (not on every transaction)
- Soft decline retries execute at configured intervals; hard declines are blocked from retry
- Refund confirmation emails send automatically with correct transaction details
- Monitoring alerts are active and you’ve received a test alert
Edge cases to verify: Test a transaction with an international card if you sell cross-border. Test a transaction at exactly your 3DS2 ticket threshold to confirm the boundary condition works. Test a refund on a transaction that was originally retried to ensure the correct amount is refunded.
Common Errors and How to Fix Them
“My authorization rate dropped after enabling 3DS2”
Symptom: Authorization rate falls 5+ points after enabling 3D Secure. Cause: 3DS2 is applied to all transactions instead of selectively. Fix: Restrict 3DS challenges to high-risk criteria only (new customers, high ticket, address mismatch). Exempt returning customers with successful purchase history.
“My processor placed a reserve on my account during peak season”
Symptom: Processor holds 5% to 10% of your daily deposits in a reserve account. Cause: Volume exceeded your approved threshold without prior notification. Fix: Contact your account manager immediately with documentation of your volume increase request. If you didn’t submit one, do so now and negotiate the reserve release timeline. To understand how transaction fees and processing costs compound when reserves are applied, review your effective rate during the hold period.
“Retries are firing on hard declines”
Symptom: You see retry attempts on transactions declined for fraud or invalid card reasons. Cause: Retry rules aren’t filtering by decline code category. Fix: Rebuild your retry rules using the decline code mapping in Step 5. Test with a hard-decline test card to confirm the fix.
“Chargebacks spiked 45 days after peak season ended”
Symptom: Chargeback volume increases weeks after your sales peak. Cause: Customers didn’t recognize charges (descriptor issue) or couldn’t easily get refunds (workflow issue). Fix: This is a lagging indicator. For next season, complete Steps 3 and 6 before volume climbs. For current disputes, respond to each with transaction evidence (delivery confirmation, customer communication, refund offer).
“My gateway doesn’t support decline-code-based retries”
Symptom: Your retry settings only allow time-based retries without code filtering. Cause: Gateway limitations. Fix: Check if a payment orchestration layer or middleware (such as Spreedly or Pagos) can sit between your checkout and gateway to add this logic. Alternatively, switch to a gateway that supports granular retry configuration.
Next Steps and Extensions
With your pre-season payment stack configured, here are three ways to extend this work:
- Add payment method diversification: Evaluate whether digital wallet payments can reduce friction for returning customers and lower your overall decline rate during peak periods.
- Implement post-purchase communication sequences: Send order confirmation, shipping notification, and delivery confirmation emails that reference the exact charge amount and billing descriptor. This reduces “I don’t recognize this charge” disputes.
- Build a seasonal volume forecasting model: Use your 12-month transaction data to build a simple forecast (even a spreadsheet trend line works) so next year’s volume increase request to your processor is data-backed and submitted 8 weeks early.
As IDC projects, embedded payments in eCommerce will represent over 70% of all online transactions by 2028. The merchants who configure their payment systems proactively, rather than reactively, will capture more revenue and lose less of it to preventable disputes.
Frequently Asked Questions
When should businesses review their payment processing setup before peak seasons?
Start at least 6 weeks before your anticipated volume increase. The biggest lead-time item is your processor’s volume threshold approval, which can take 3 to 5 business days. You also need time to test configuration changes, verify billing descriptors, and confirm retry logic works correctly. Rushing this process in the final week before a sale or holiday season leaves no room to fix problems.
What is a seasonal volume playbook in merchant services optimization?
A seasonal volume playbook is a documented set of payment stack configurations, processor notifications, and monitoring thresholds that you activate before each peak period. It typically includes your approved volume ceiling, authentication rule adjustments, retry parameters, refund workflow changes, and alert thresholds. Think of it as a pre-flight checklist for your payment processing infrastructure.
How can businesses use data to forecast transaction volume for seasonal planning?
Export 12 months of transaction data from your gateway and identify your peak windows. Calculate the ratio of peak daily volume to your average daily volume. Apply that multiplier to your current baseline to estimate next season’s peak. Even a simple spreadsheet trend line gives you a defensible number to share with your processor when requesting volume threshold increases.
Why do chargebacks spike after peak season instead of during it?
Chargebacks have a built-in delay. Customers typically have 60 to 120 days to file a dispute after a transaction. During peak season, customers are buying quickly from many merchants. Weeks later, when they review their statements, unfamiliar charges trigger disputes. This is why billing descriptor clarity (Step 3) and post-purchase communication are critical pre-season tasks.
How does a transaction retry strategy recover revenue without increasing risk?
A smart retry strategy distinguishes between soft declines (temporary issues like insufficient funds or issuer timeouts) and hard declines (permanent issues like stolen cards). You only retry soft declines, with limits on frequency and total attempts. This recovers legitimate transactions that failed for temporary reasons without violating card network rules or triggering fraud flags.
Can processor risk holds be prevented during high-volume periods?
Yes, in most cases. The primary cause of surprise holds is unapproved volume spikes. By notifying your processor in advance with expected volume figures, promotion dates, and historical data, you give their risk team context. They can pre-approve higher thresholds for your account. Get the approval in writing so you have documentation if a hold is applied in error.